You're rejecting the entire doc. Please enter your comments or reason.
DocsCube Deal Rooms are secure, digital platforms designed to facilitate closer relationships in sales and post-sales processes.
These rooms are structured using customizable sections, including:
These sections provide a tailored, organized presentation of information, making it easier to navigate for both your team and your clients.
Key Features:
DocsCube Deal Rooms can be divided into phases, allowing for a systematic approach to managing and progressing deals. They are versatile and can be used for various activities, including:
For more information on maximizing the capabilities of deal rooms, please read 'Deal Rooms / How to Set Up a DocsCube Deal Room'.
DocsCube processes are a set of activities divided into phases and performed repeatedly to accomplish a specific result. Each phase of the process can have its own assigned workflow.
For example, you can set up and automate the following end-to-end processes in your organization:
For more information, please read ‘Processes / How to Set Up a DocsCube Process’.
DocsCube workflows are a set of actions assigned to a specific phase of the DocsCube process. A workflow will automatically execute once a request enters its assigned phase.
You can set up the following actions as part of a workflow:
For more information, please read ‘Workflows / How to Set Up a DocsCube Workflow’.
A Request Form is used to start your process and includes all the information needed to run it. With DocsCube's form builder, you can easily create a web form to collect standardized information, such as text, dates, documents, and stakeholders.
The fields in the Request Form can be used as variables in your workflows and for generating documents.
Submitting the Request Form begins the process. You can also share the form with stakeholders via a link to start the process externally.
For more information, please read ‘Processes / Request Form Setup’.
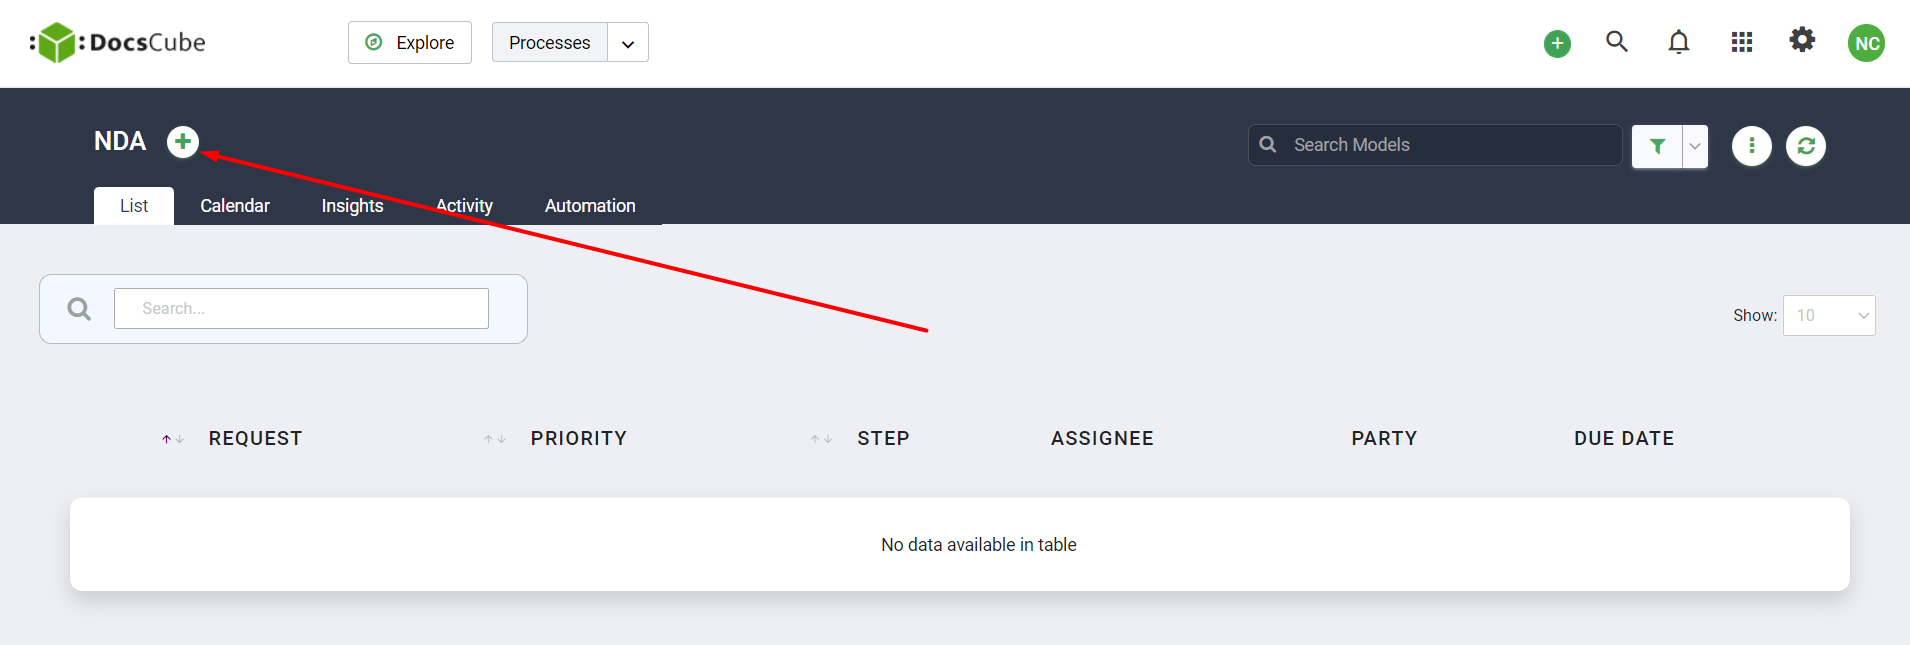
A Request is an instance of a DocsCube process. It is created when a user or external party fills out a request form. All requests are displayed on the process overview screen.
Single Stage Process: Requests are listed under the List tab.
Multi Stage Process: Requests appear as cards in the Kanban view tab.
Requests can represent different information depending on the process, such as:
Clicking on a request instance on the process overview screen will display a modal showing all the information and status regarding that request. This includes:
For more information, please read ‘Processes / Request Form Setup’.
DocsCube processes are activities divided into phases, performed repeatedly to achieve a specific result.
For simple processes, select Single Stage Process. For complex processes, choose Multi Stage Process.
Your choice depends on your use case. For example, a simple NDA generation can use a Single Stage Process with two actions: Generate Document and Send for Signing.
For a more complex NDA process involving approvals or negotiations, choose Multi Stage Process. This allows separate workflows for each phase, such as Request Submitted, Send Document to Client, Completed, and Rejected. Each phase has a workflow with specific actions. For instance, Request Submitted includes Generate Document and Send for Approval. If approved, it moves to Send Document to Client. If not, it moves to Rejected, which sends an email and generates the NDA again with new information.
Once you have the process phases and clear picture of what needs to happen you can proceed to the process setup.
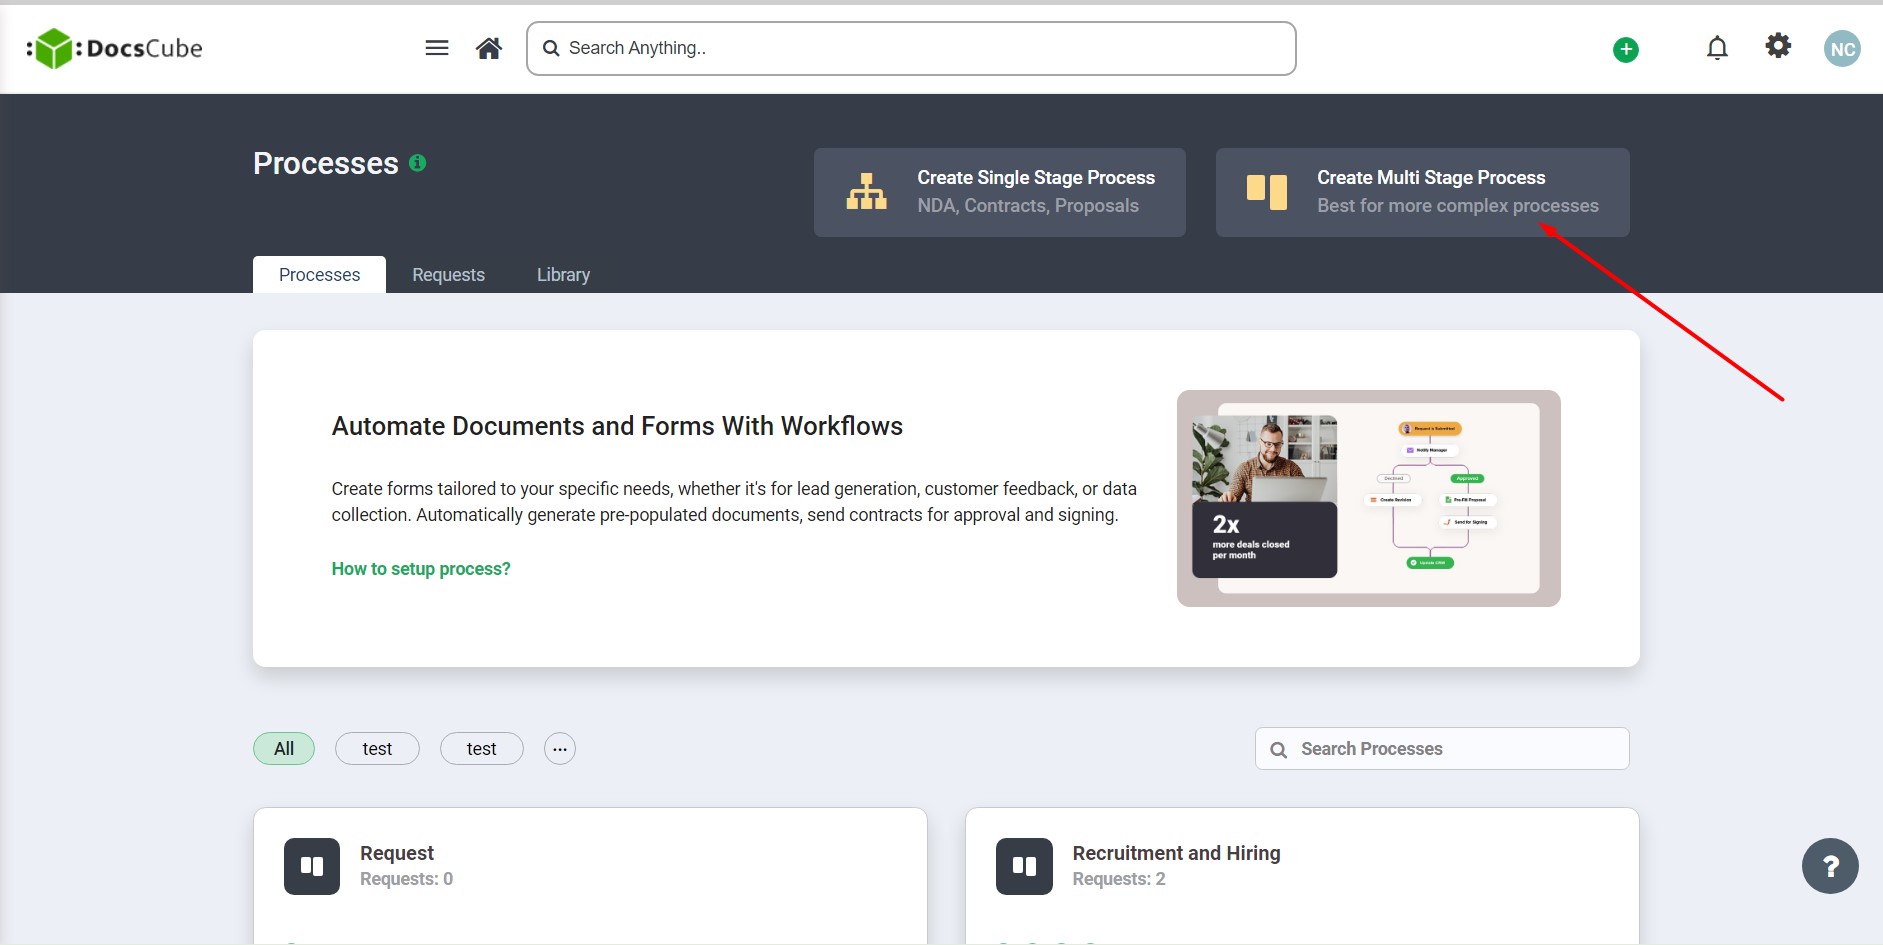
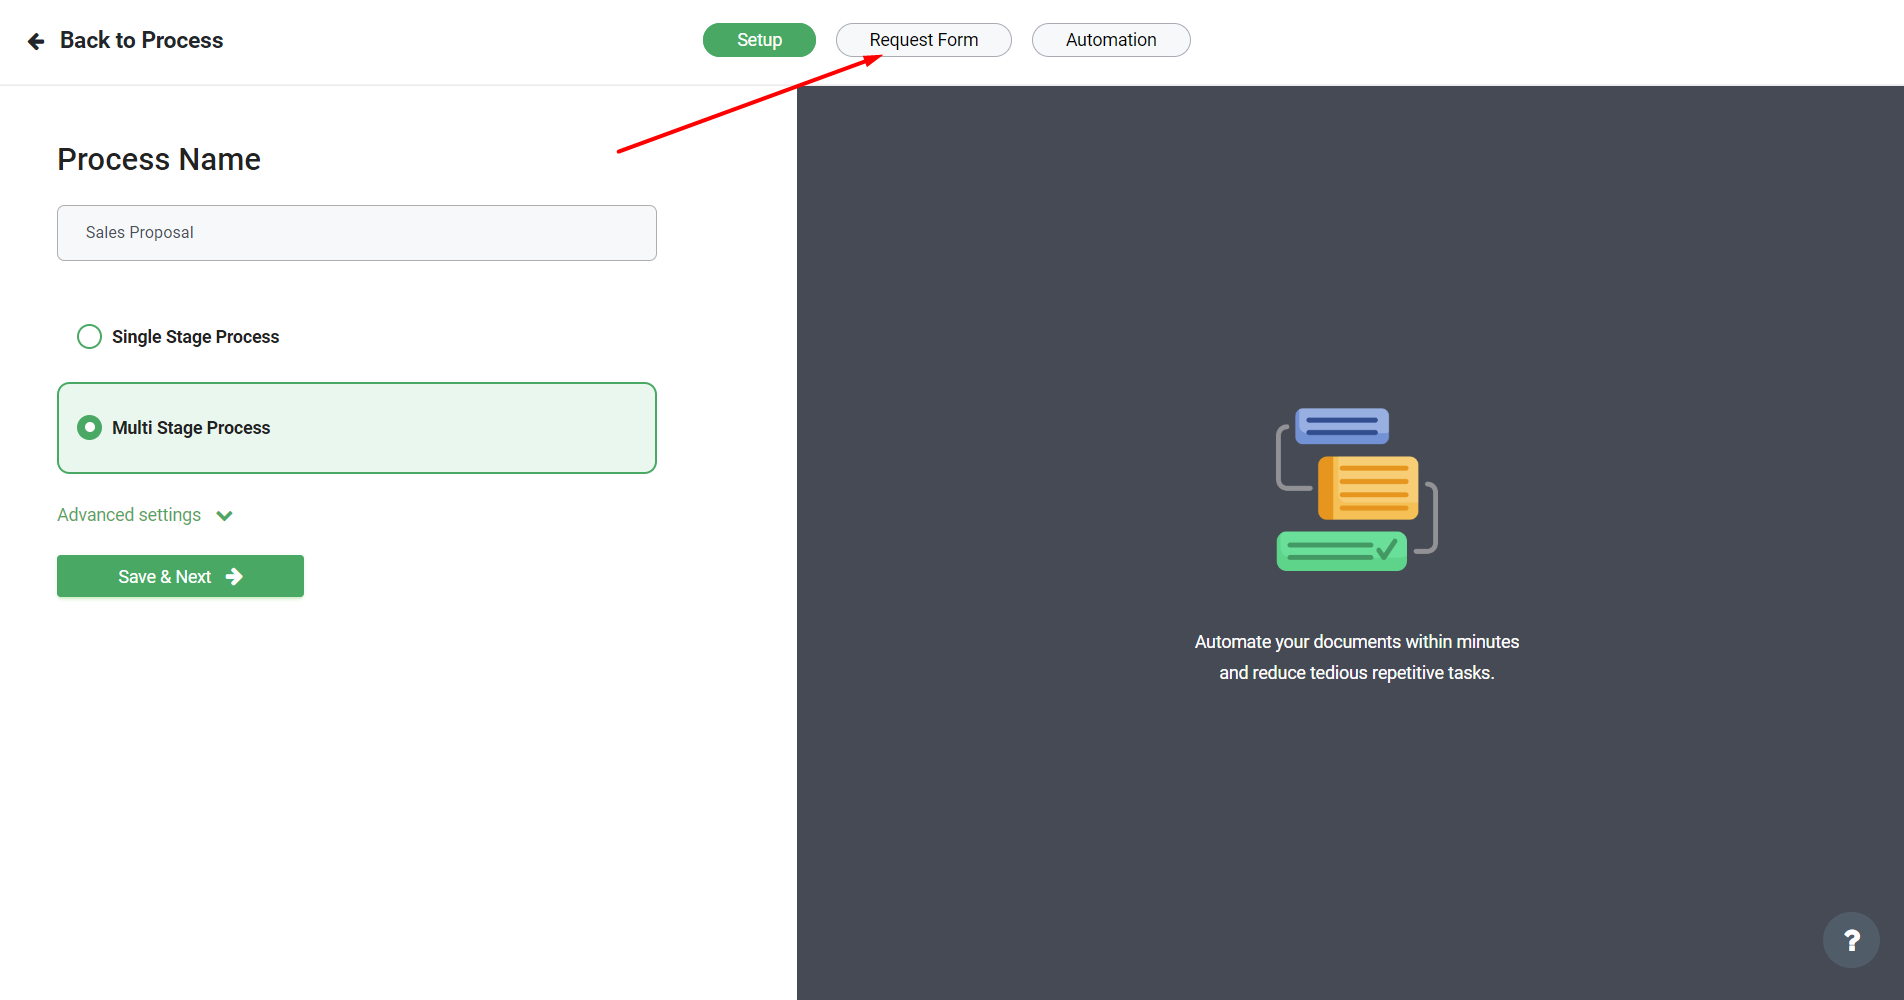
1. Navigate the main menu and go to Process Automation. There you can select either ‘Create Single Phase Process’ or ‘Create Multi Stage Process’. In this example we will show Multi Stage Process, but setup for the single phase is very similar.
2. First we want to set up the ‘Request Form’ that will collect all the data necessary to initiate the process. Use the ‘Add Form Field’ button to add the fields to the Request Form. We will use this data to setup workflow automations that can prefill documents, send approvals and trigger signatures.

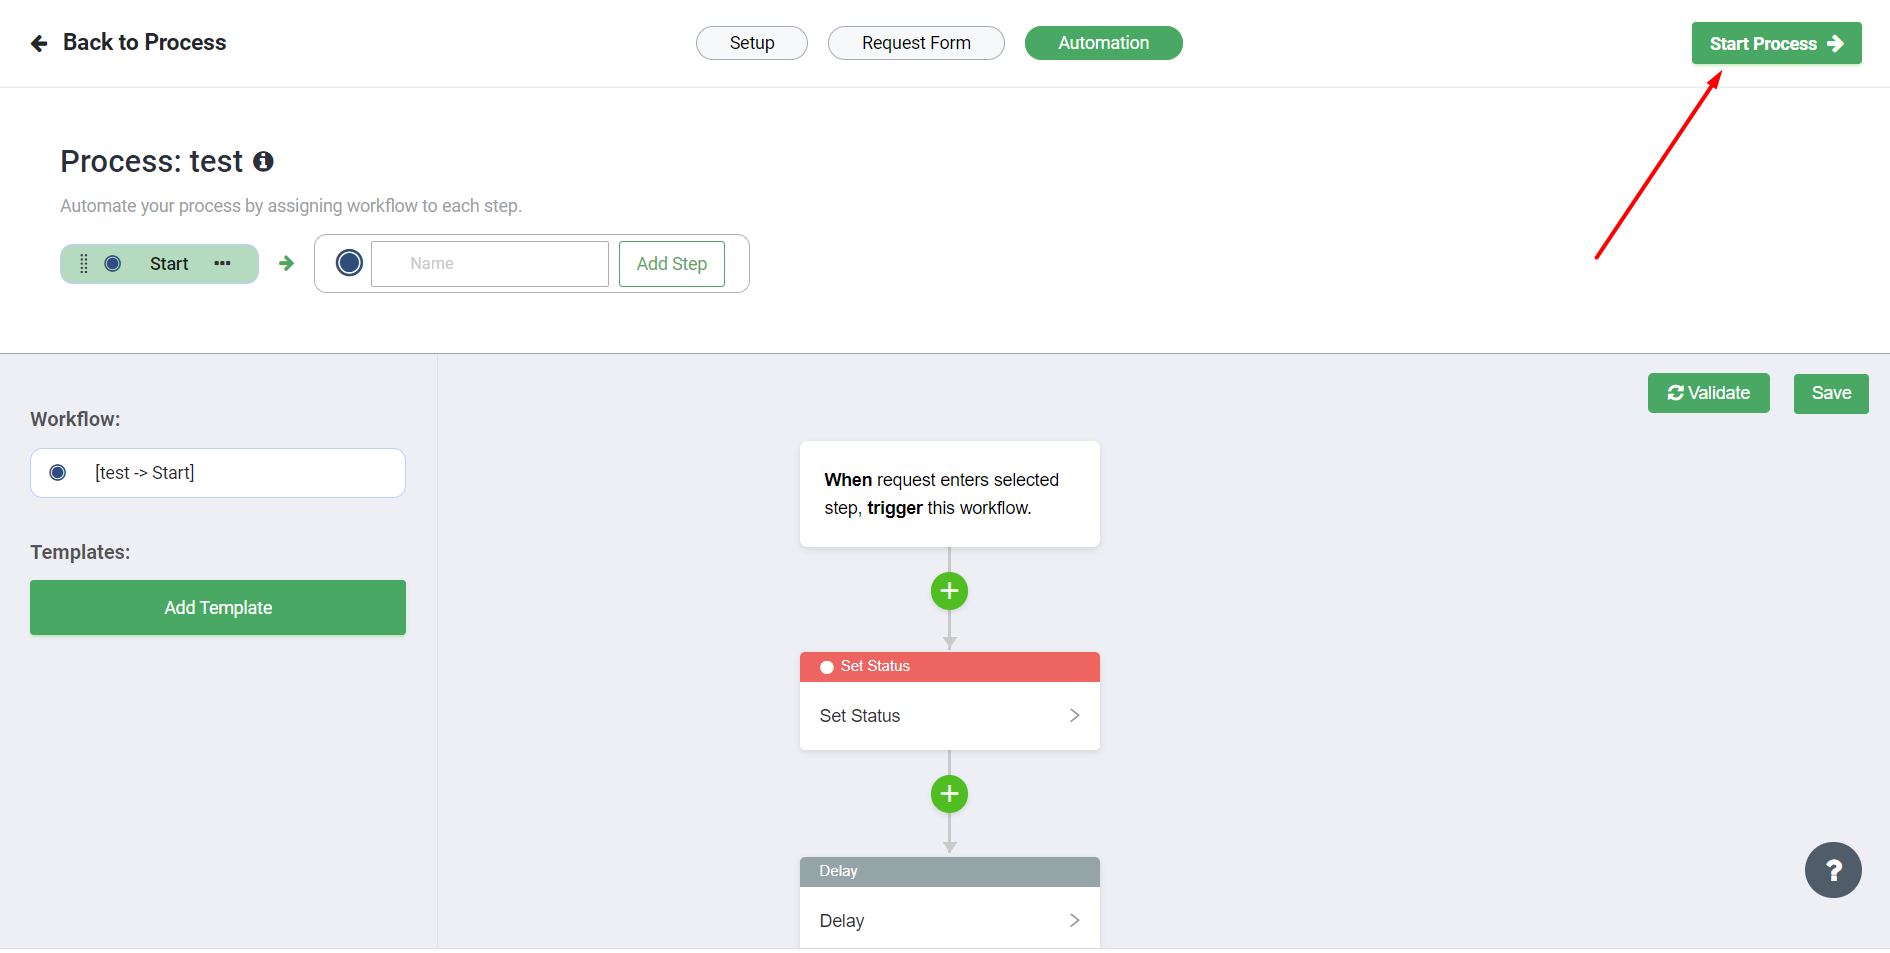
3. Once the Request Form is ready, find the 'Automation' tab at the top of the screen. Use the 'Add Phase' button to add phases to your process.
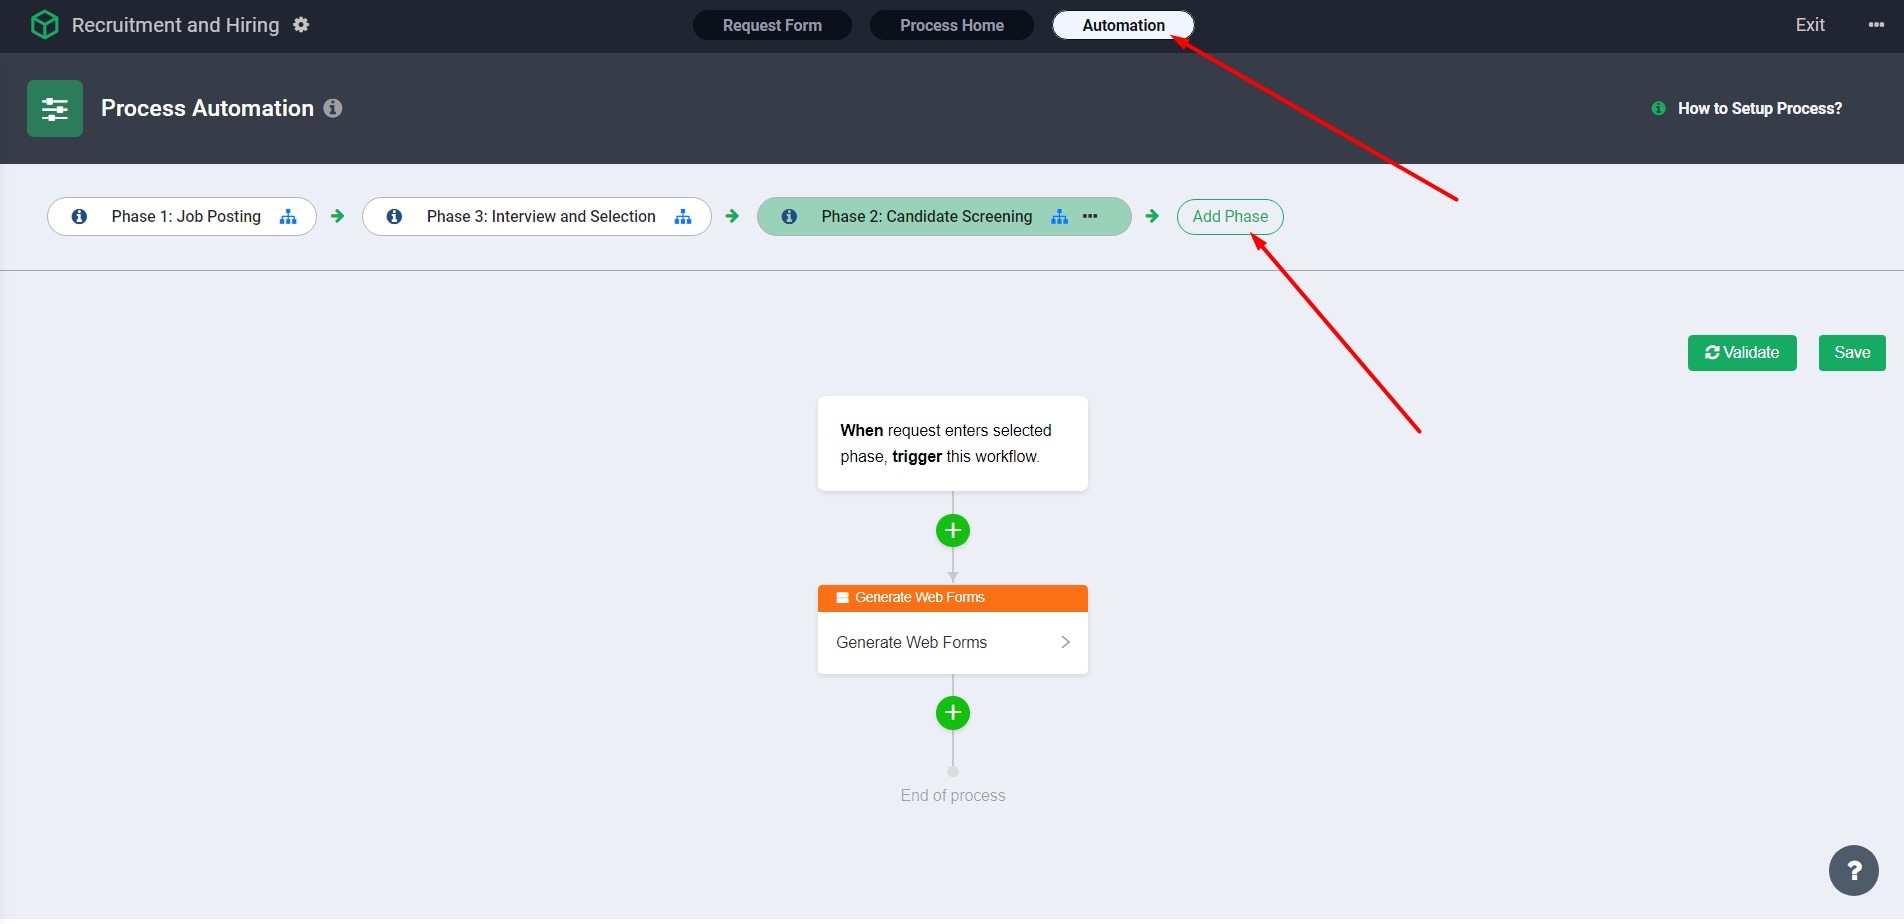
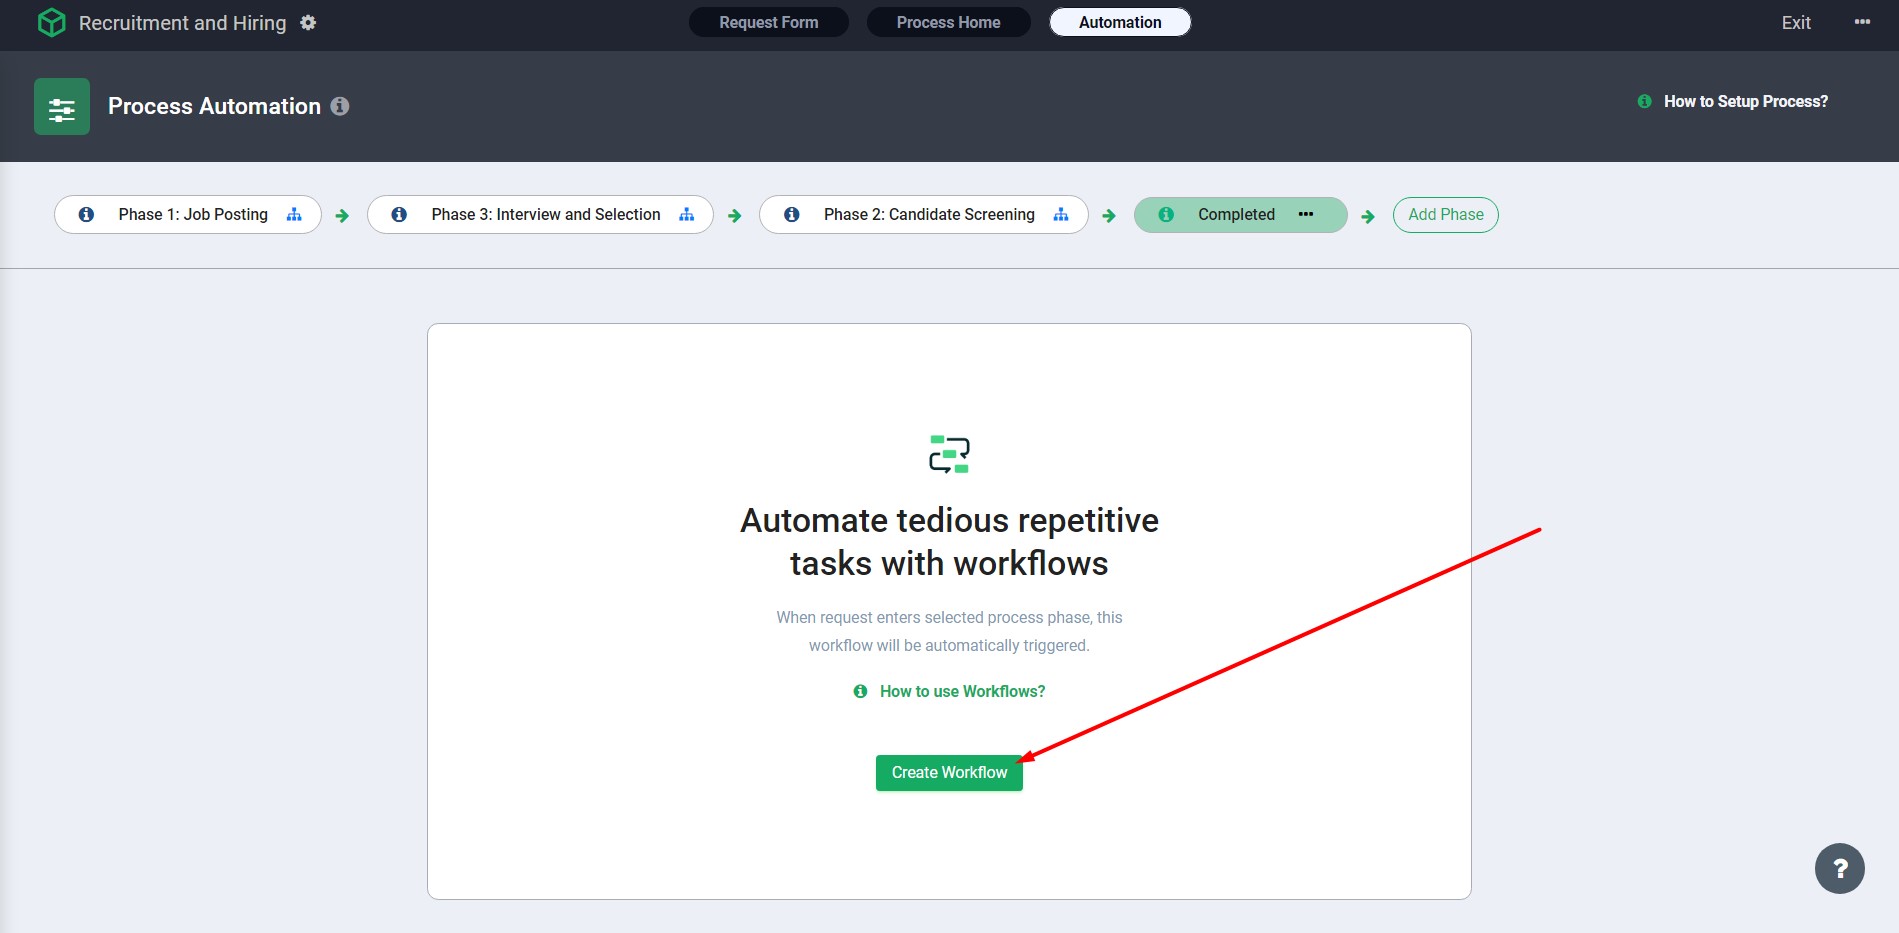
4. By clicking on the Phase Name we will open a screen that will allow us to 'Create Workflow'. We can use workflow actions to generate documents, forms, approvals and signatures.
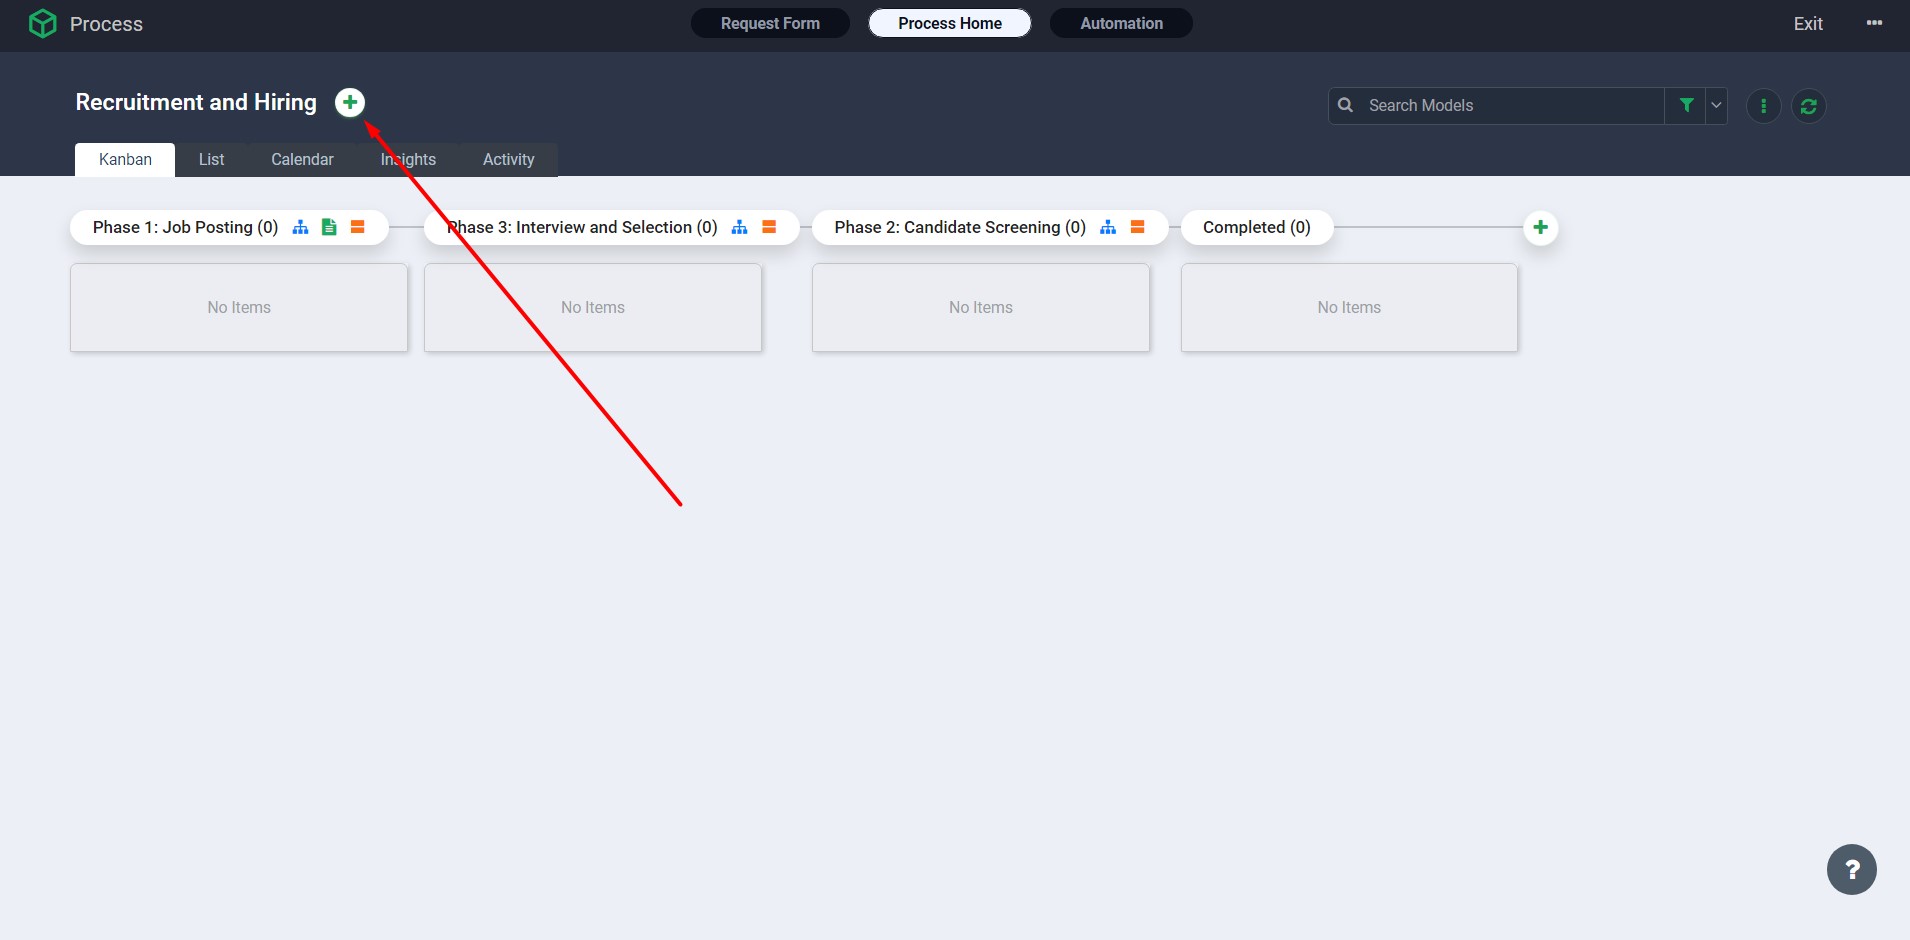
5. Once we complete the Process Setup we can create a process request by navigating to 'Process Home' tab and clicking on the ‘plus’ icon.
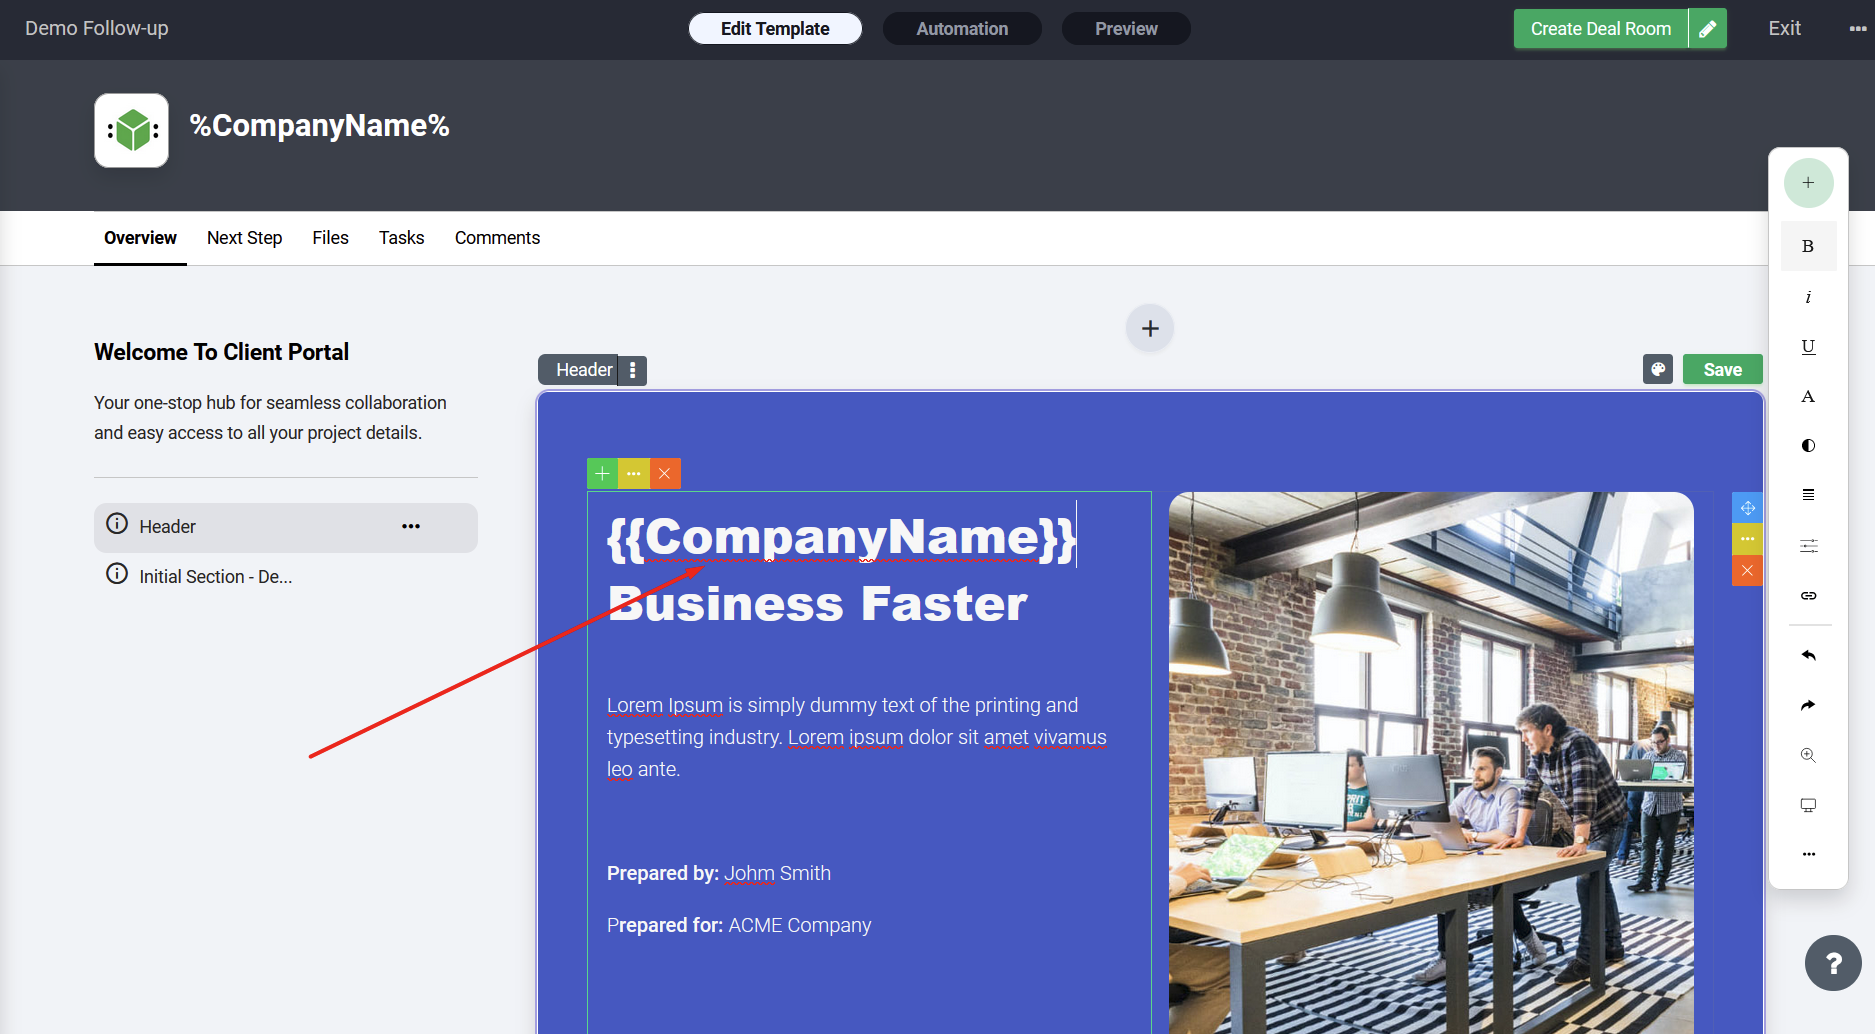
DocsCube Deal Rooms offer a simplified approach to creating a digital space where businesses and clients can interact seamlessly. The ‘Quick Create’ dialog facilitates the setup process, making it accessible for businesses of any size to implement a functional and effective client portal.
STEP 1: Start
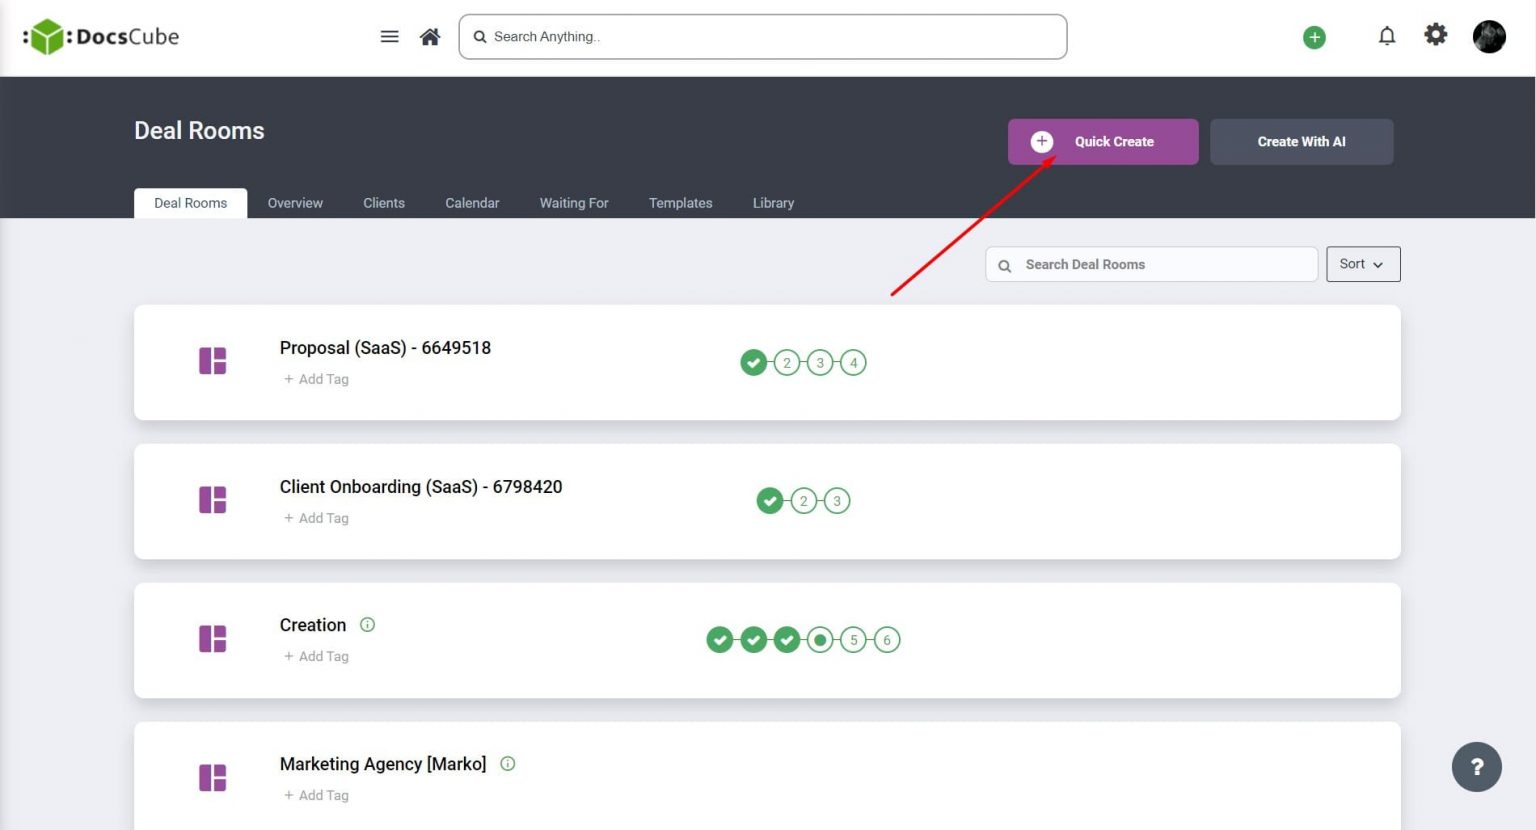
Navigate to the ‘Deal Rooms’ main menu item and click on the ‘Quick Create’ button. The intuitive interface will guide you through the initial steps.
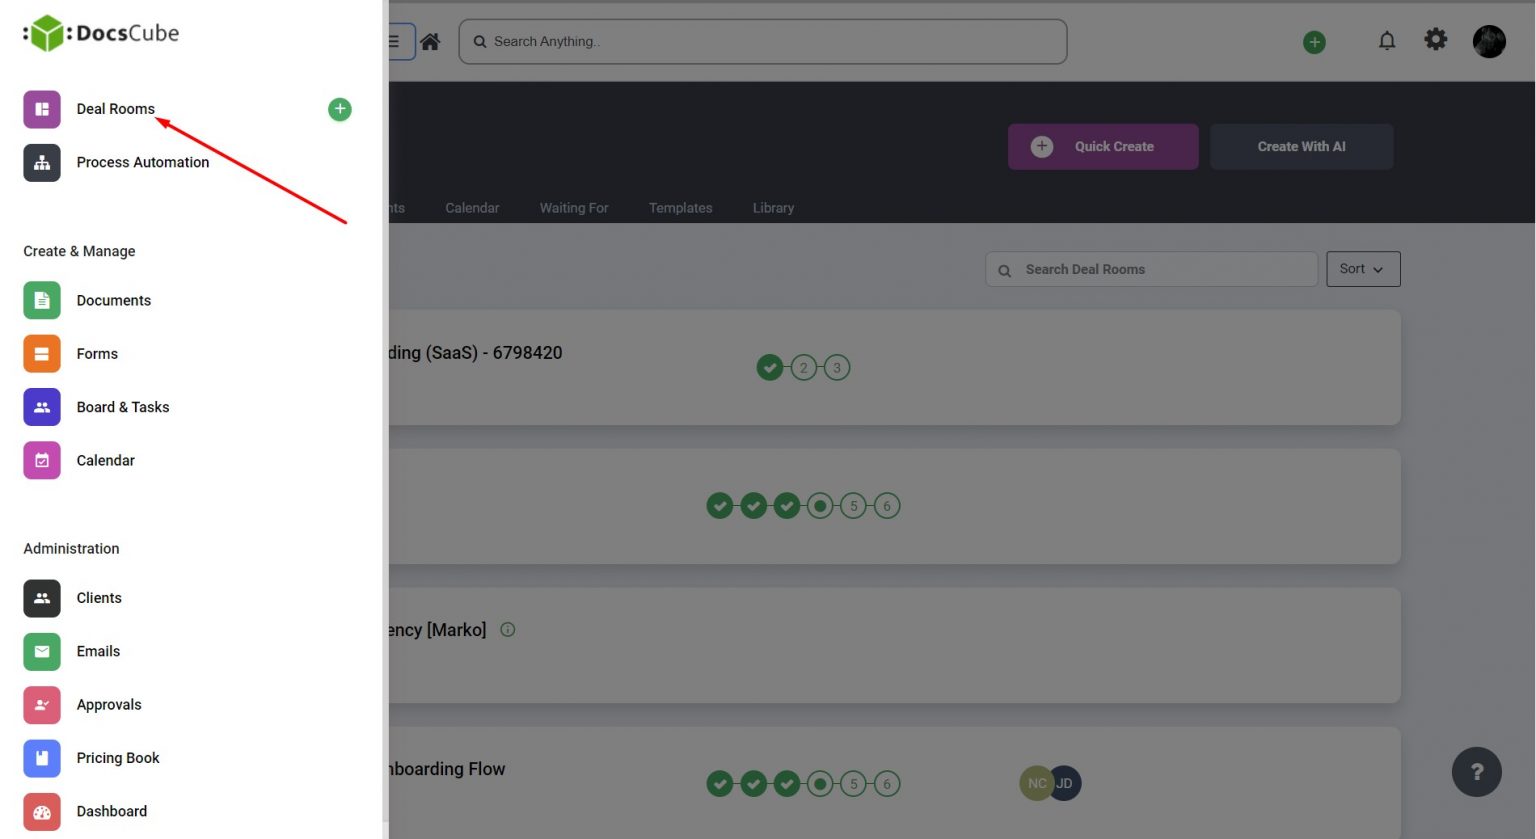
‘Quick Create’ Button
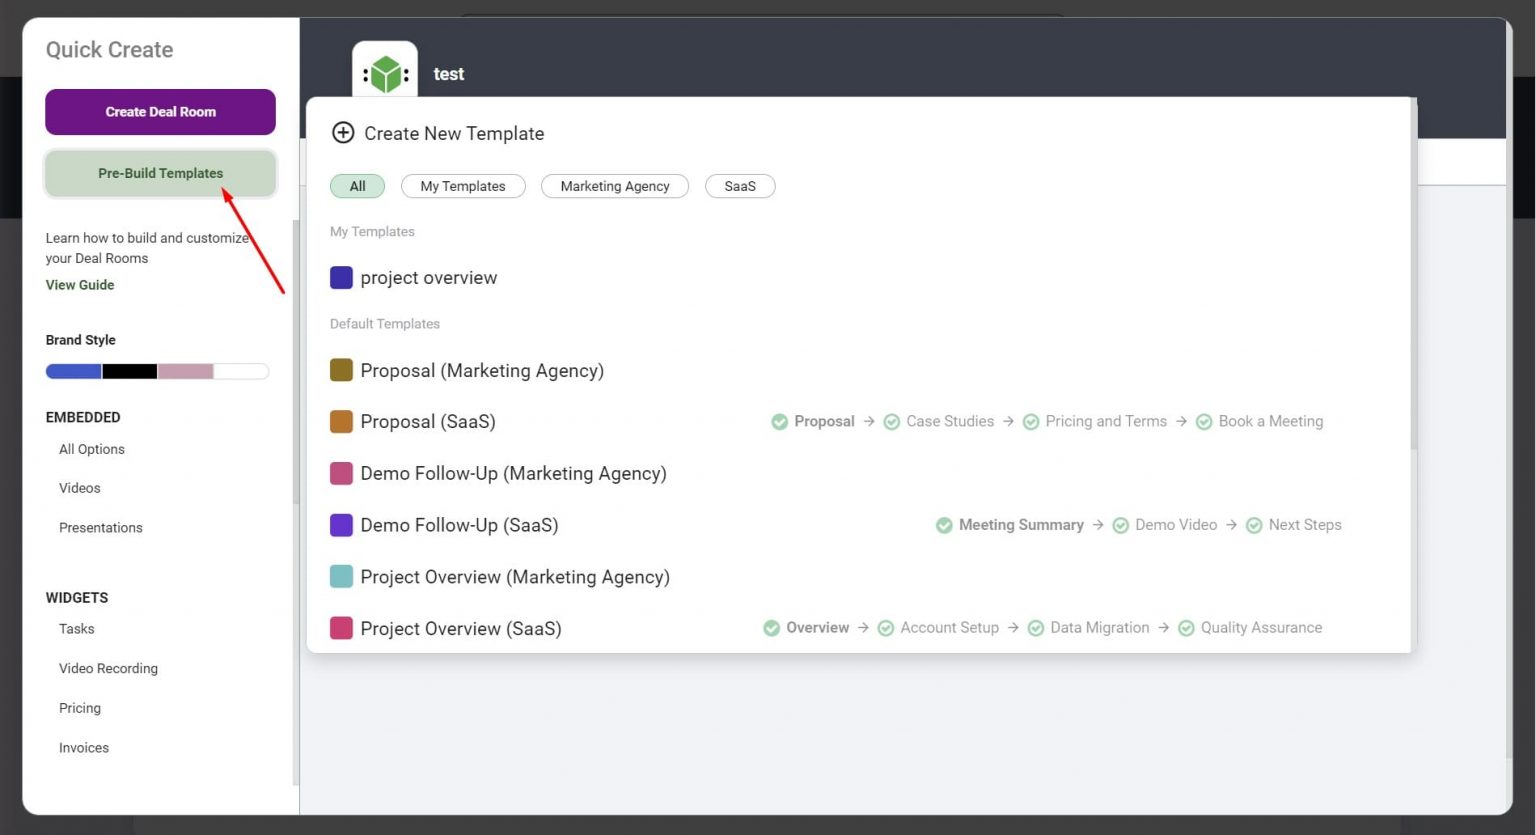
STEP 2: Template Selection
Utilize the ‘Quick Create’ dialog to choose a template that aligns with your project’s requirements. DocsCube offers a variety of templates designed to cater to different business needs, making it simple to find one that fits your vision. Alternatively, you have the option to start from scratch, providing a blank canvas to build a deal room from the ground up.
STEP 3: Customization
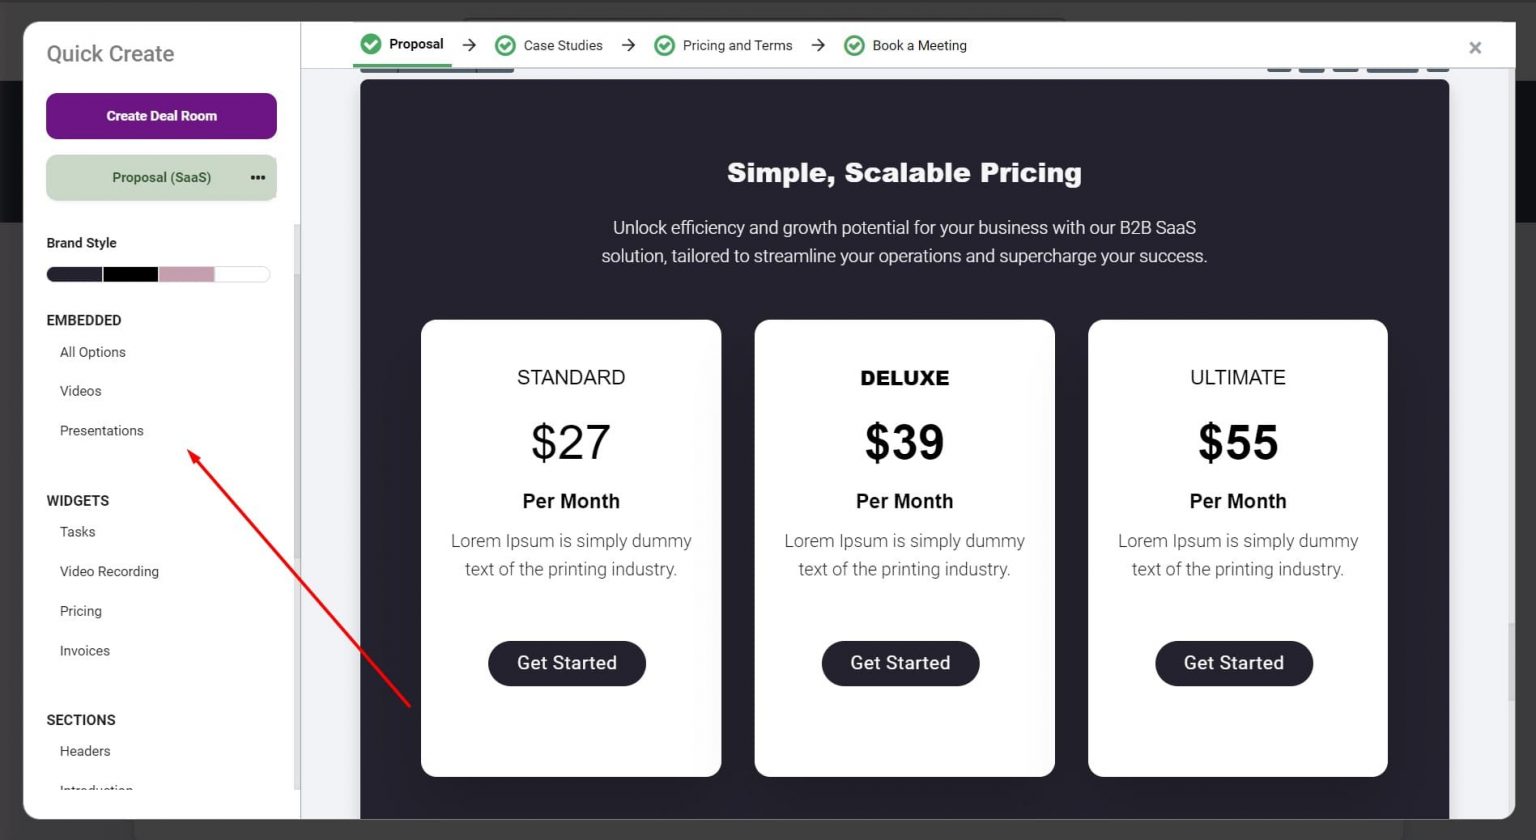
Navigate through the available sections on the side panel to add essential components to your Deal Room. This is your opportunity to shape the portal according to your business identity and client needs. From document uploads to task assignments, each section adds a layer of functionality and engagement to your deal room.
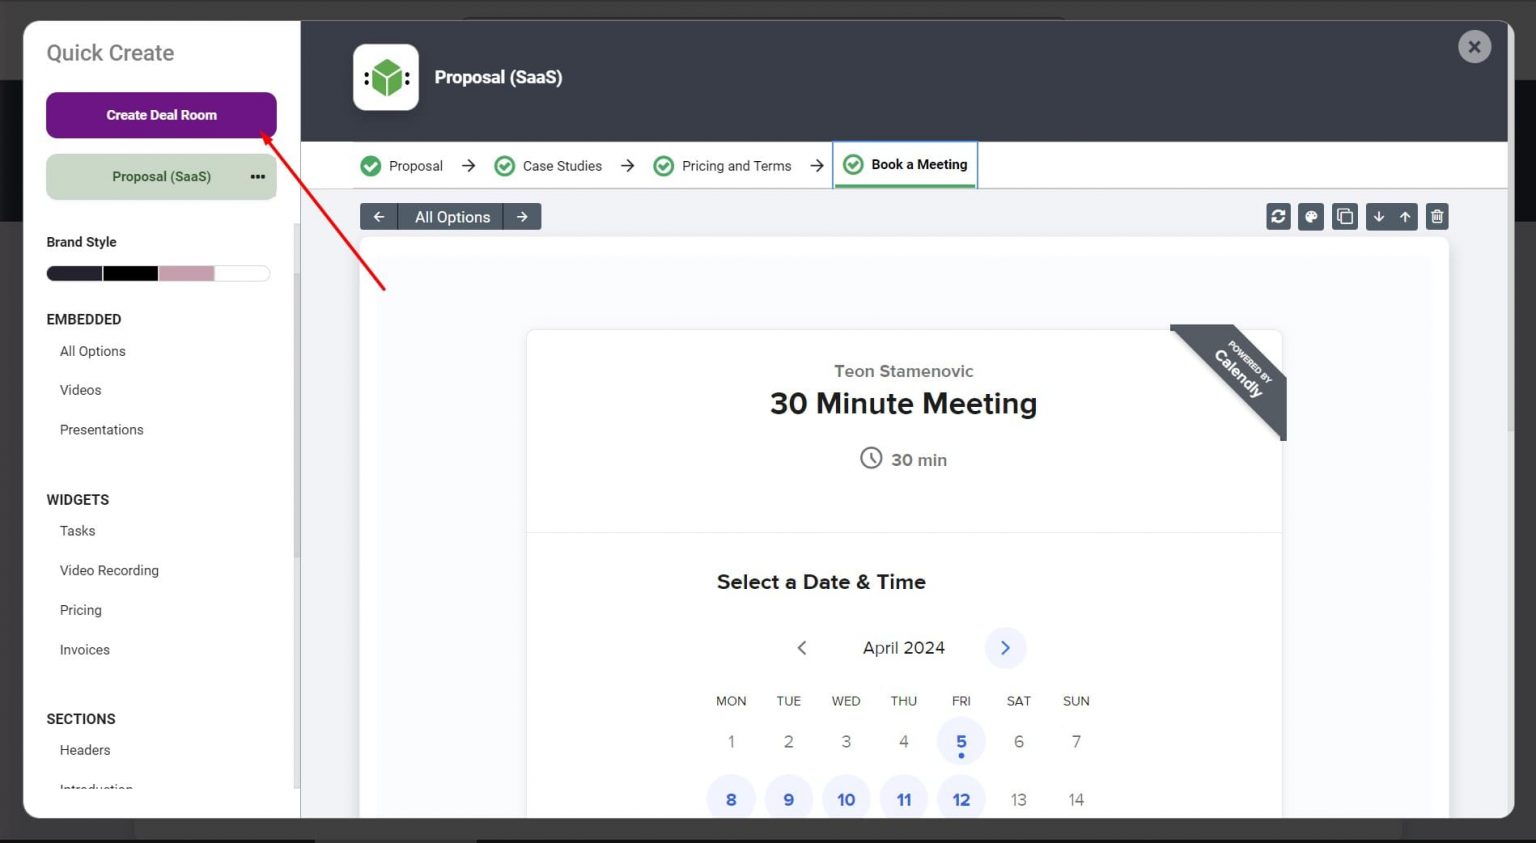
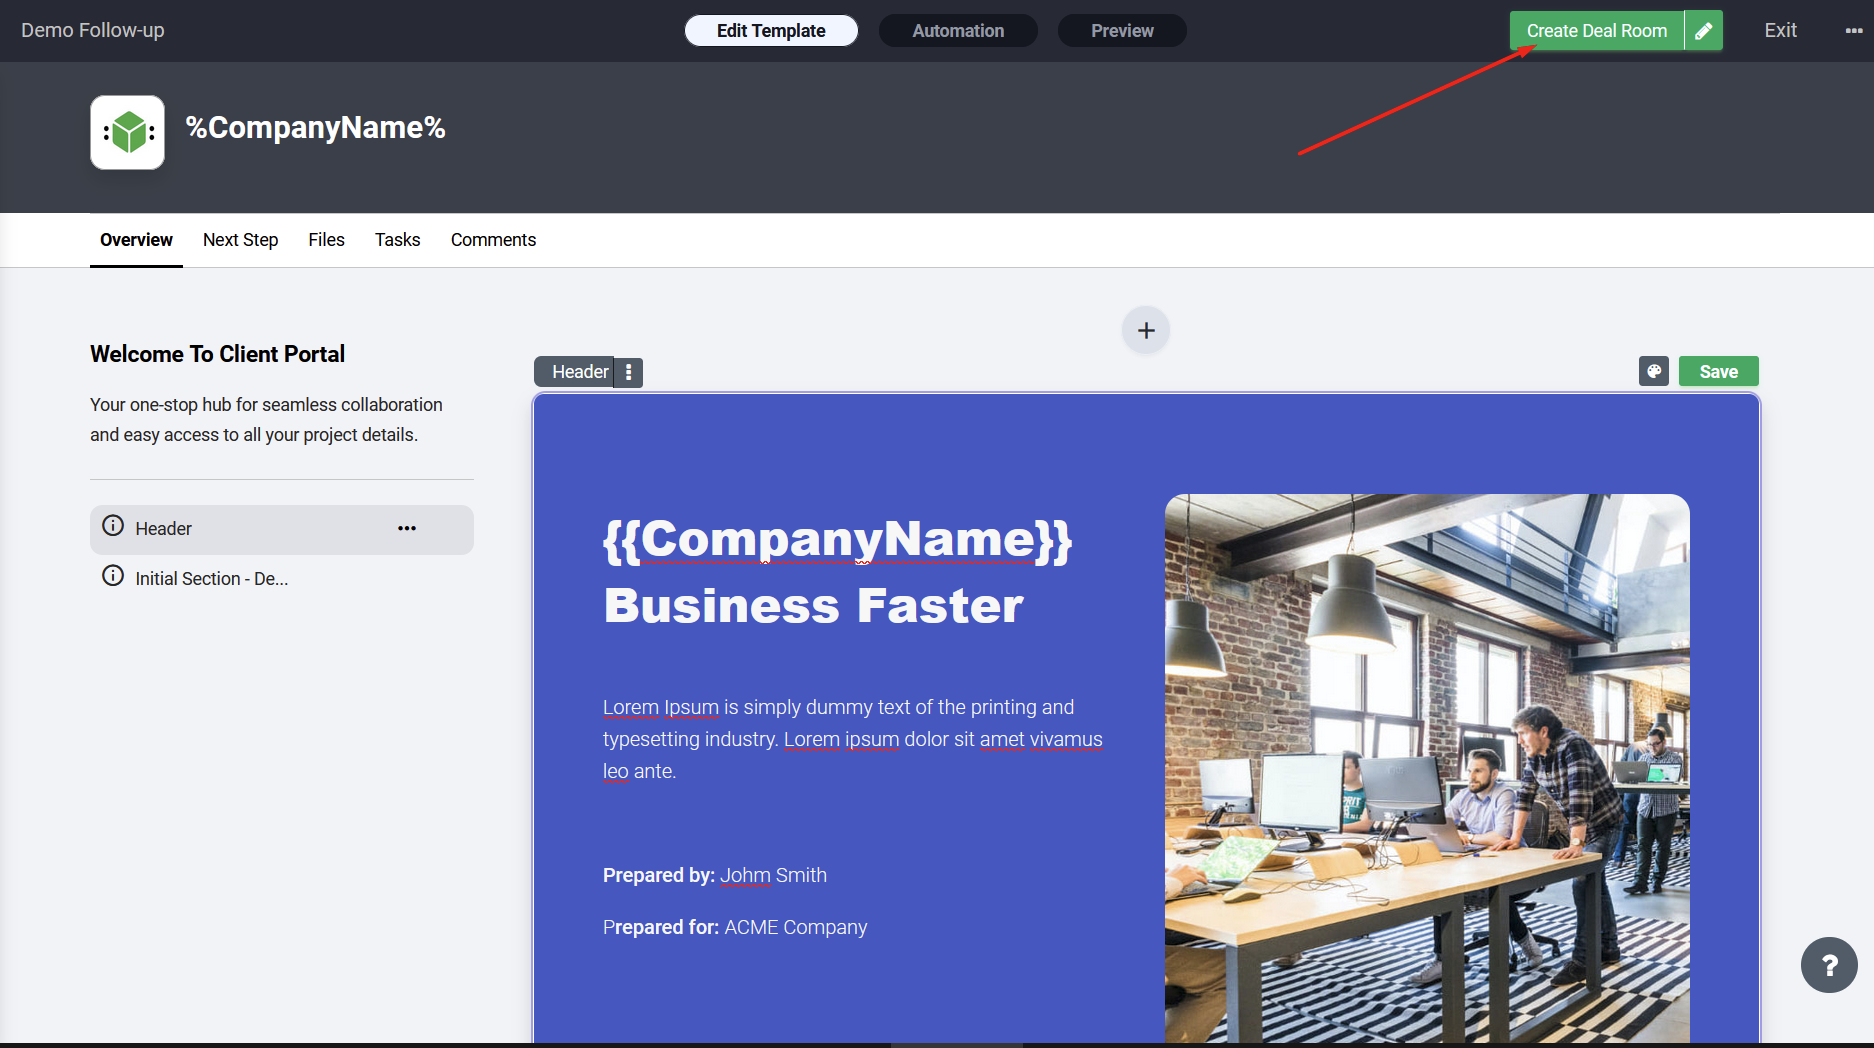
STEP 4: Launch
Once you’re satisfied with the design and structure, clicking the ‘Create Deal Room’ button will redirect you to the Preview screen. It’s important to remember that this step is not final—you can always return to edit mode to add or adjust tasks, documents, and forms.
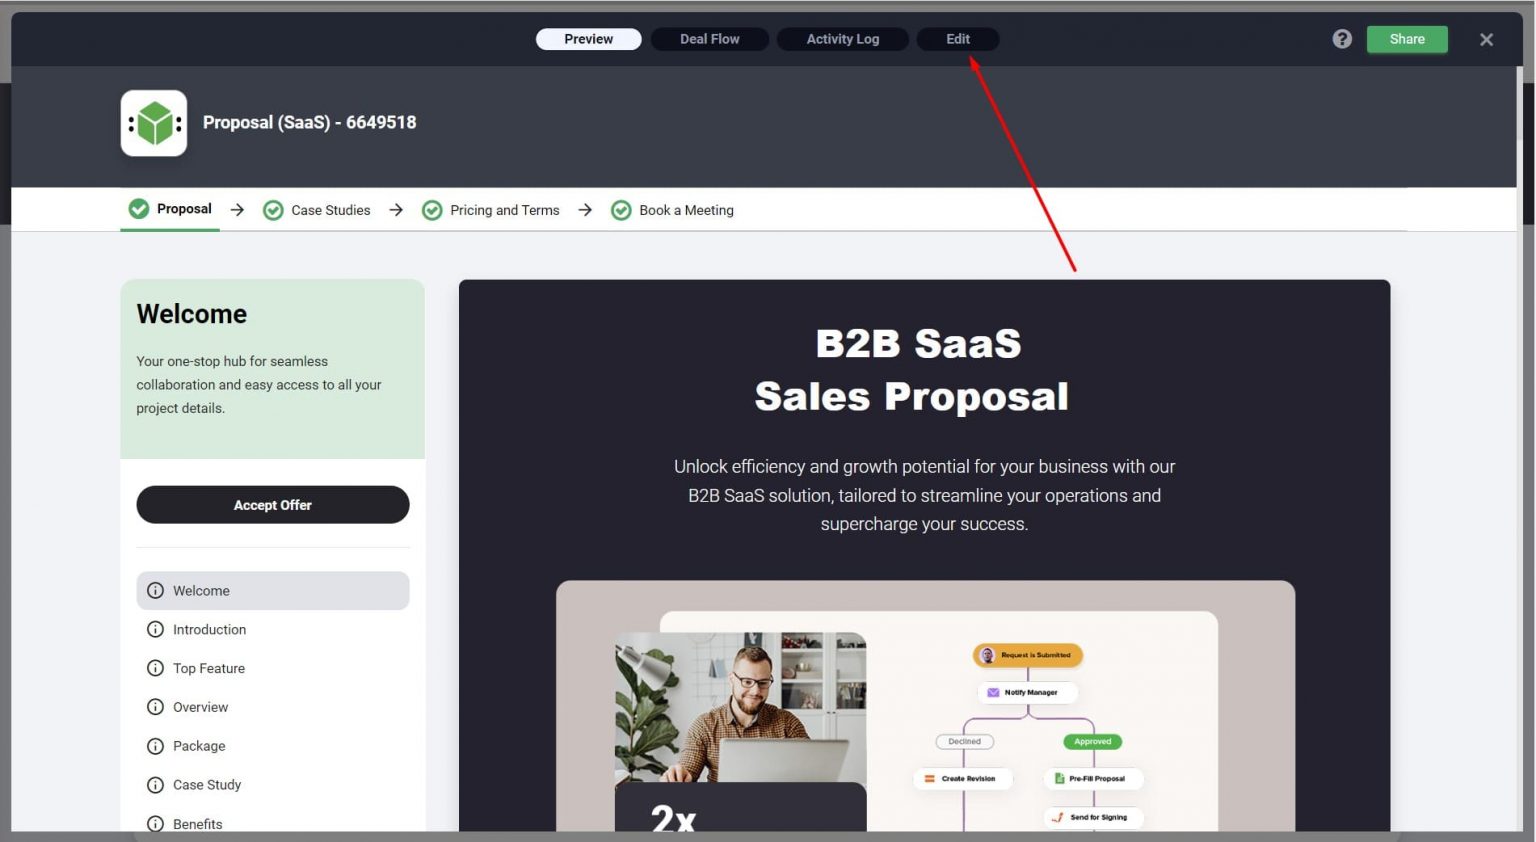
STEP 5: Review and Refine
You’ll be directed to a preview tab where you can see your Deal Room in action. This is the perfect time to make any tweaks or additions, ensuring that every element aligns with your goals.
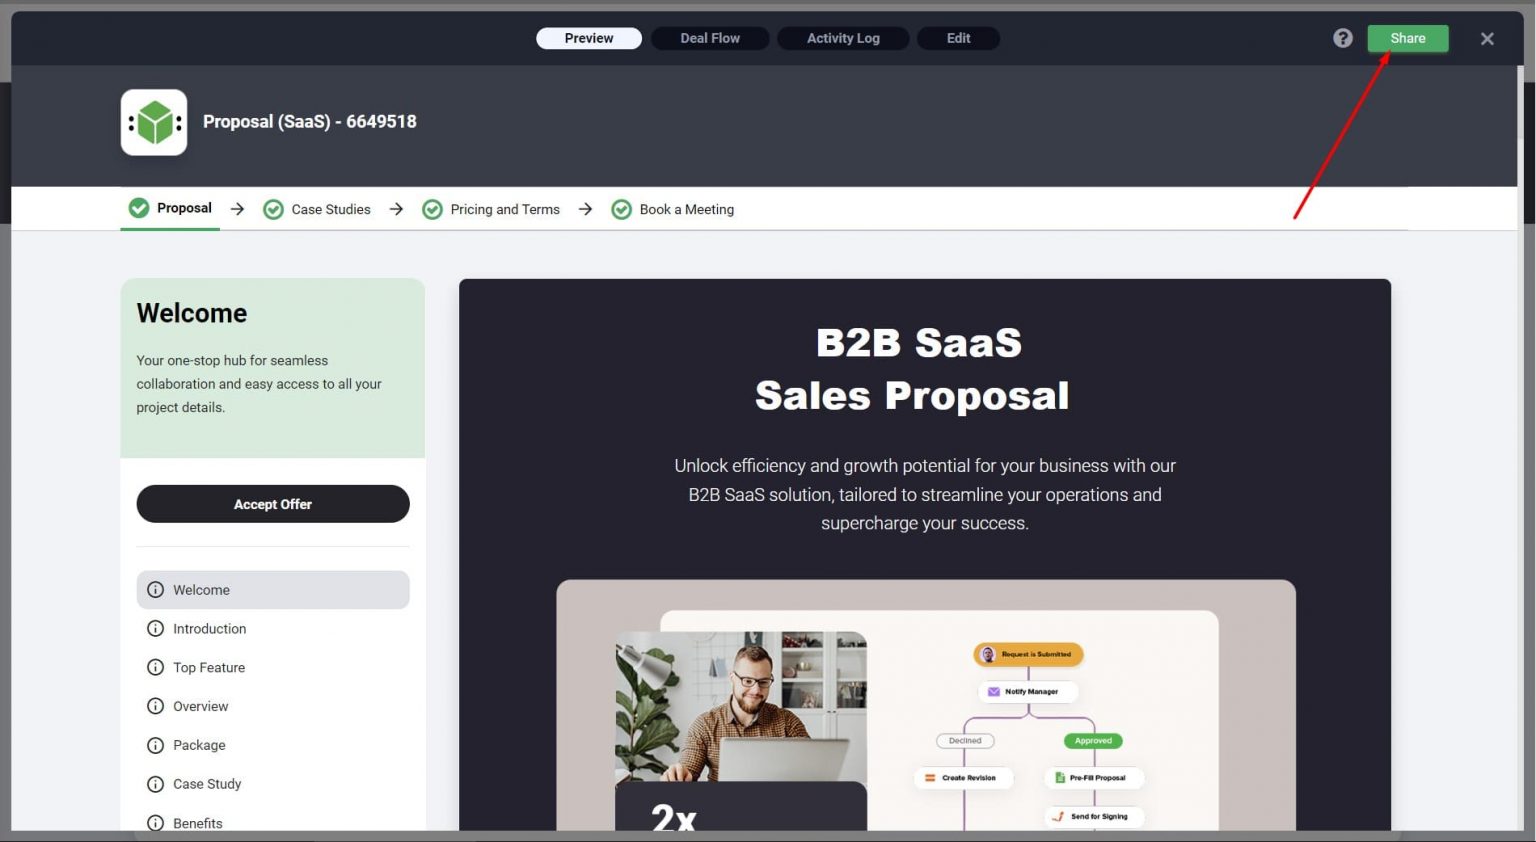
STEP 6: Setup Completed
Once you are happy with your setup, it is time to share the portal with your client. Go to the top right corner and click on the ‘Share’ button.
STEP 7: Sharing Your Portal
With your Deal Room ready to go, it’s crucial to share it with your clients. DocsCube provides flexible sharing options, from direct invites to creating a public link. This ensures that your portal is accessible to your intended audience in a manner that suits your business model.
Invite People
To invite people directly to your Deal Room, you can send personalized invitations through email, ensuring a selective and secure access.
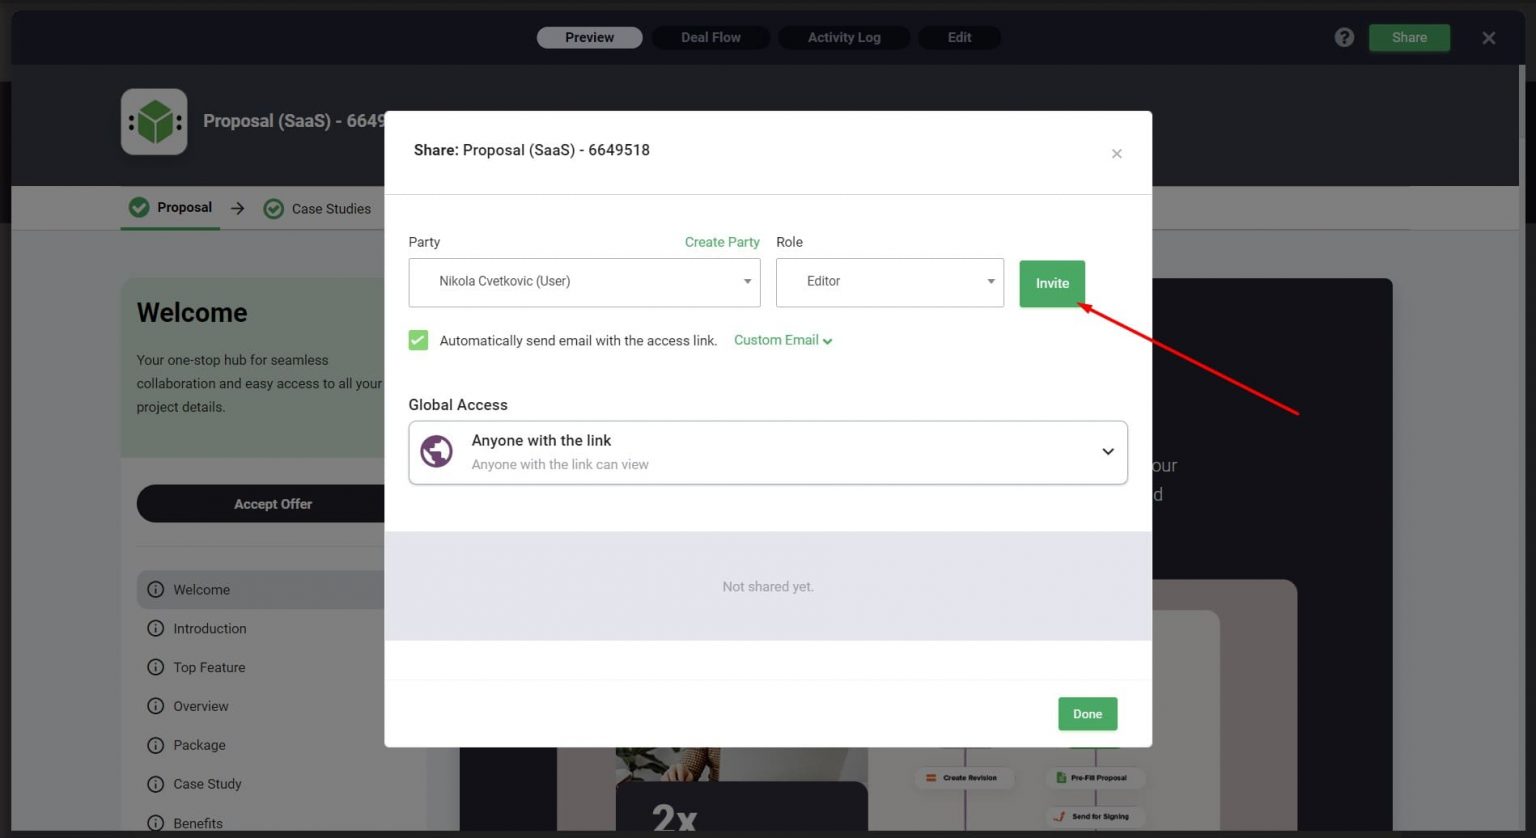
Use Public Link
For broader access, creating a public link allows you to share your Deal Room with a wider audience, making it easily accessible with a single click.

Every DocsCube process request begins with request form submission. Request form needs to have all input fields necessary to complete the process.
How to set up a Request Form?
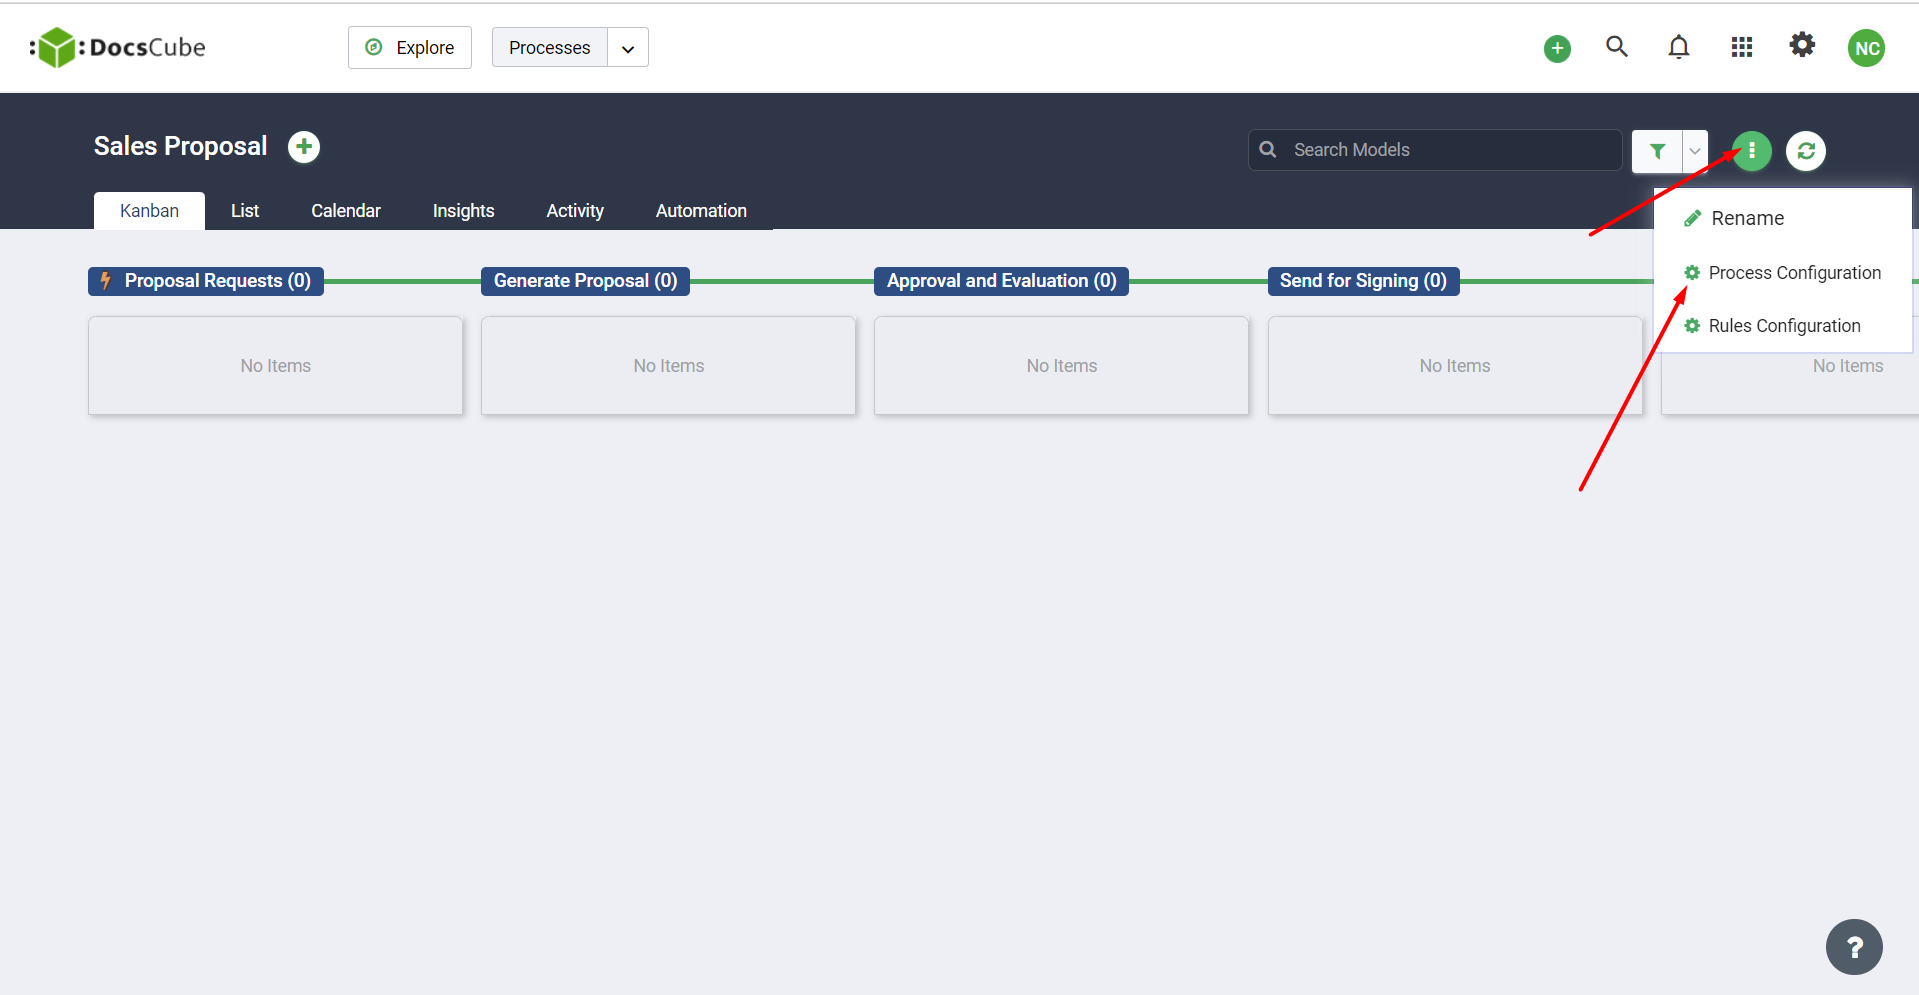
In case you are creating the process, setup request form is a second step of the process creation wizard. If you want to edit request form of an existing process, go to the process overview screen and select Process Configuration from the options menu.
This will lead you to the Process Configuration screen. Click the Request Form tab at the top to access the Request Form configuration screen.
Configuring the Form
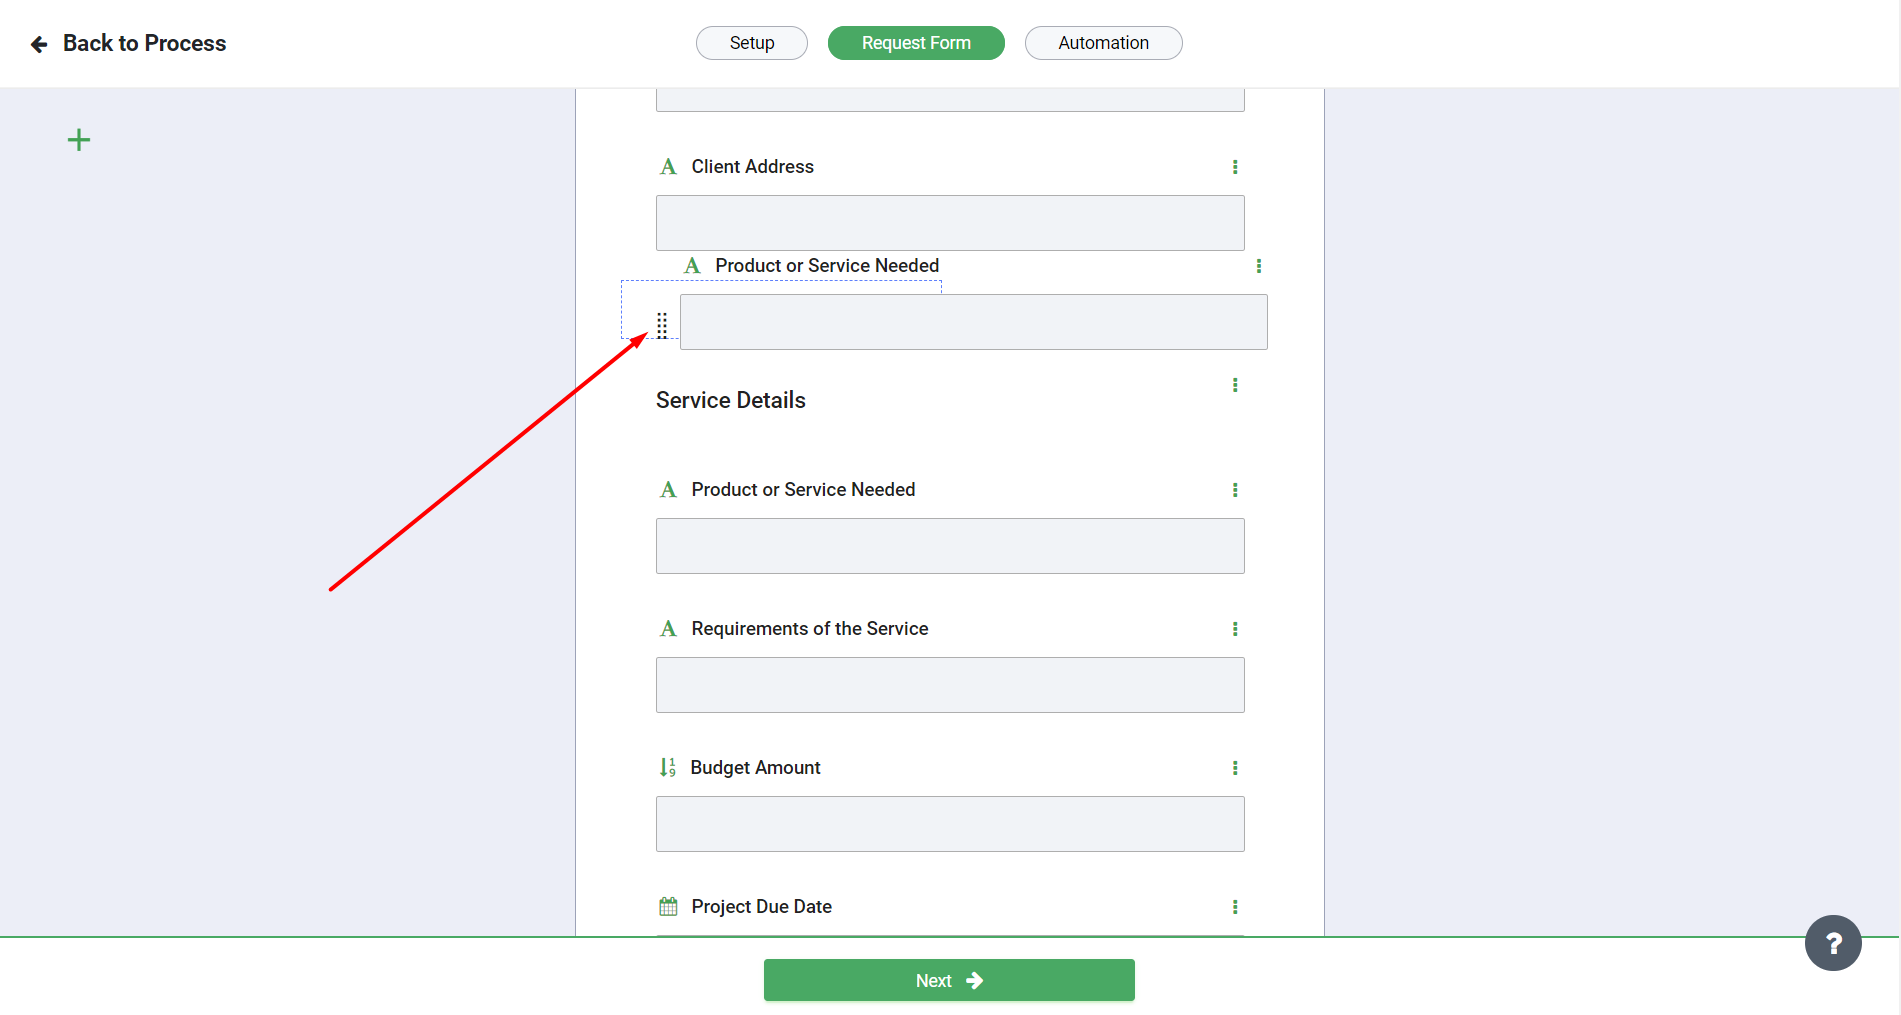
Adding input fields to the form is easy. Click on the Add Form Field button and select the input field type to add to the form.
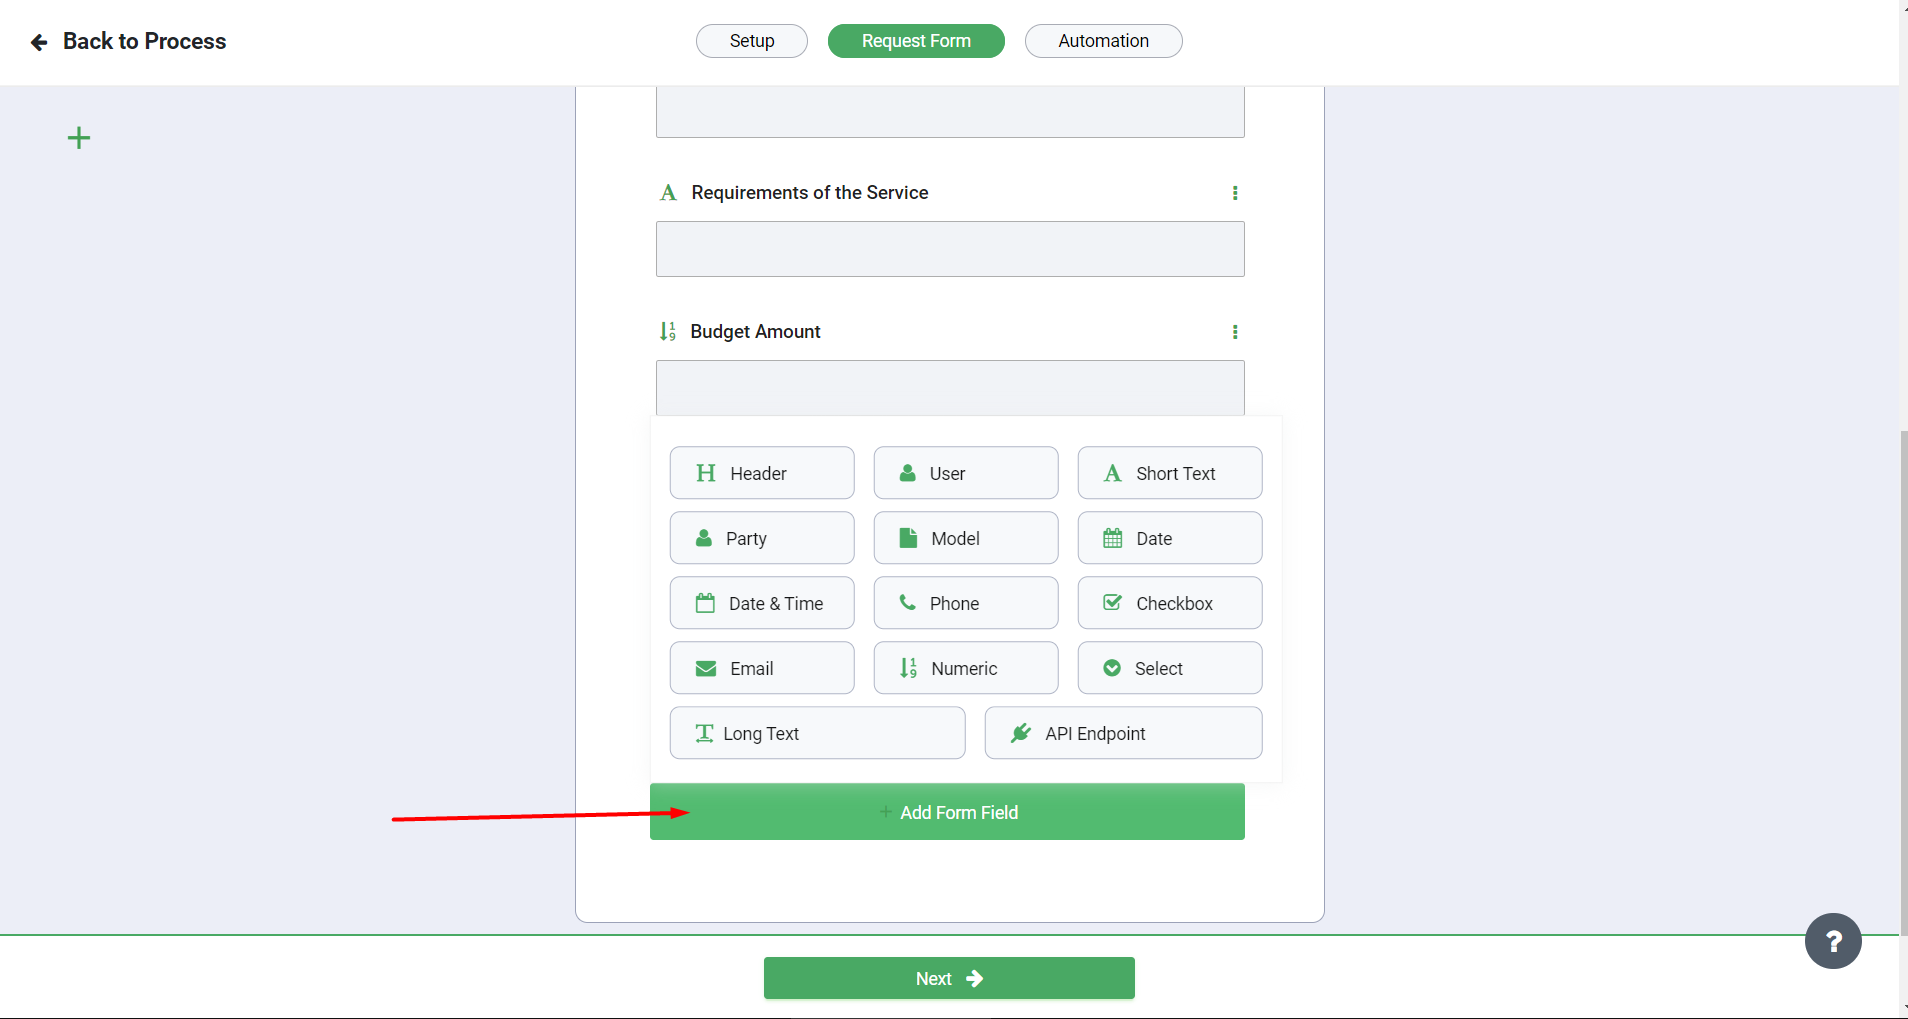
The following input field types are supported:
Header, User, Short Text, Model(Document/Webform), Date, Date & Time, Phone,
Checkbox, Email, Numeric Value, Select Dropdown, Long Text and API Endpoint
field.
For each field type you can configure name, width, default value and you can choose if you want to show the field on the external view (form displayed for not logged in users).
In addition, by hovering your mouse on the left side of the input field a drag & drop icon will appear that allows you to order the fields on the request form.
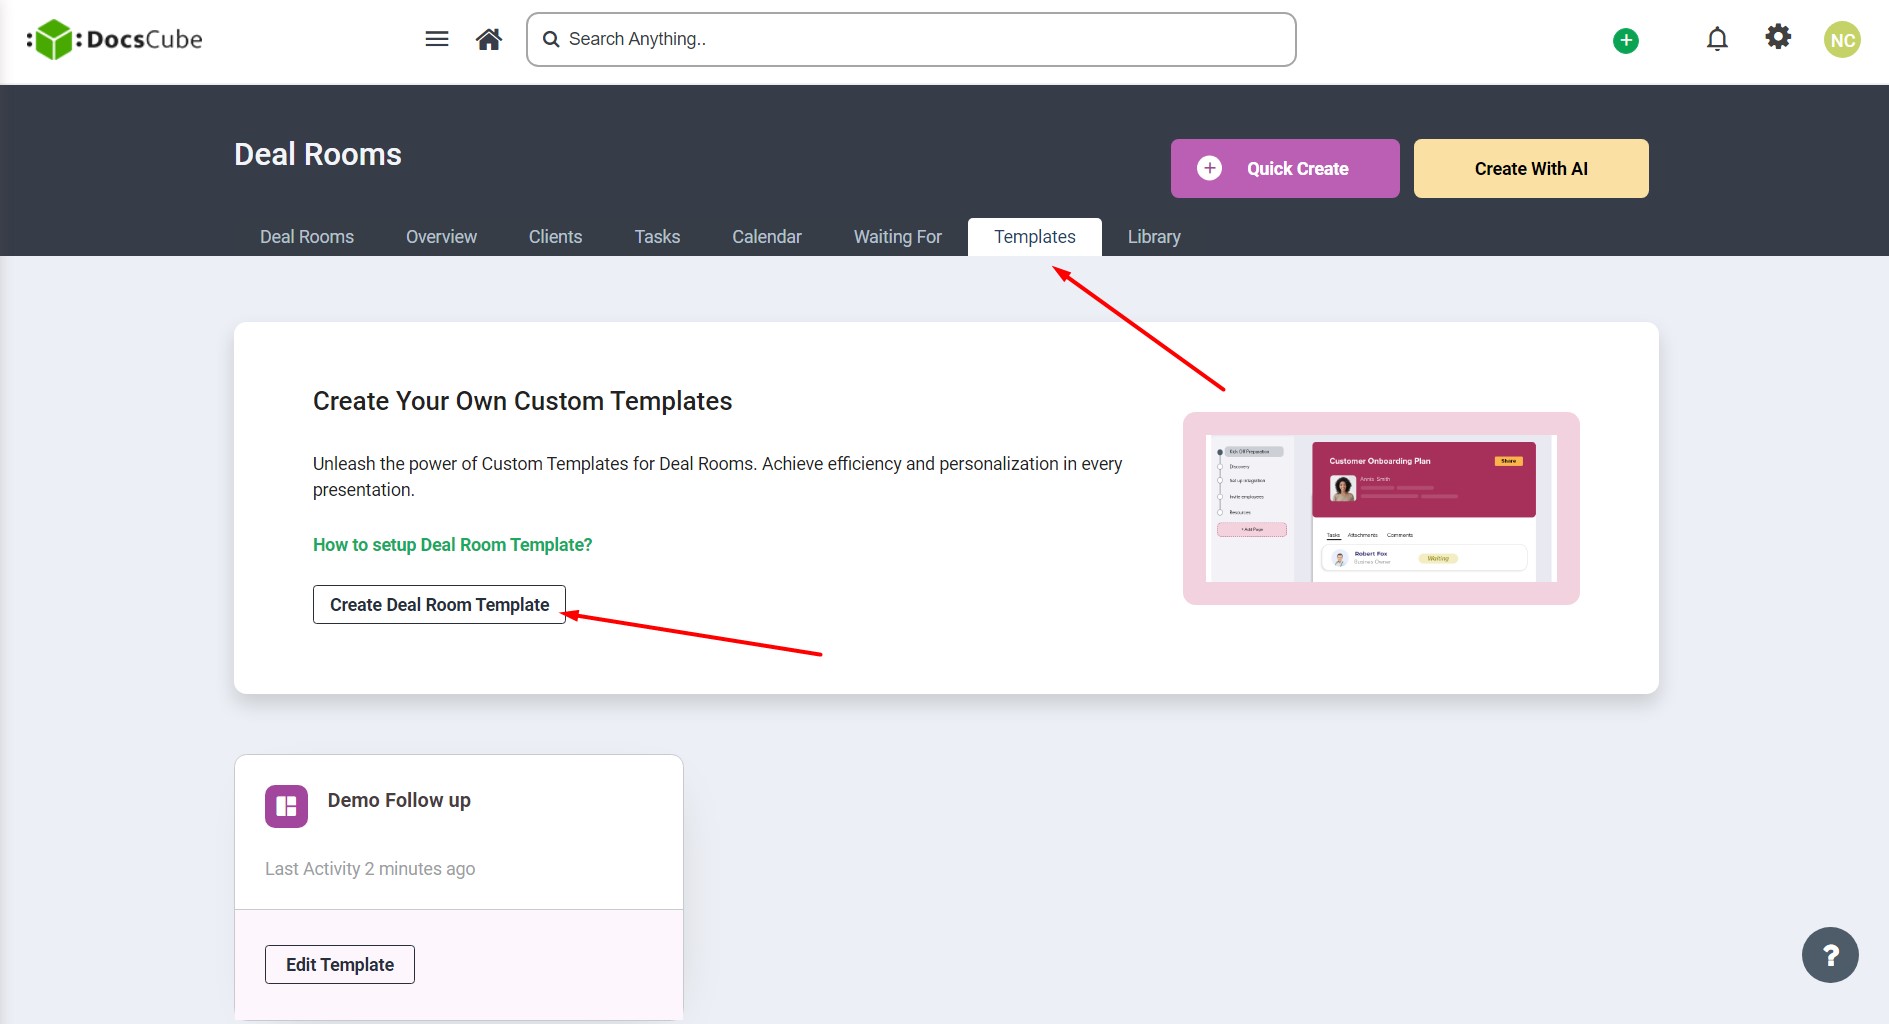
1. In order to set up Deal Room Template navigate to Dealrooms tab in the main menu and in the Templates tab click ‘Create Deal Room Template’ button
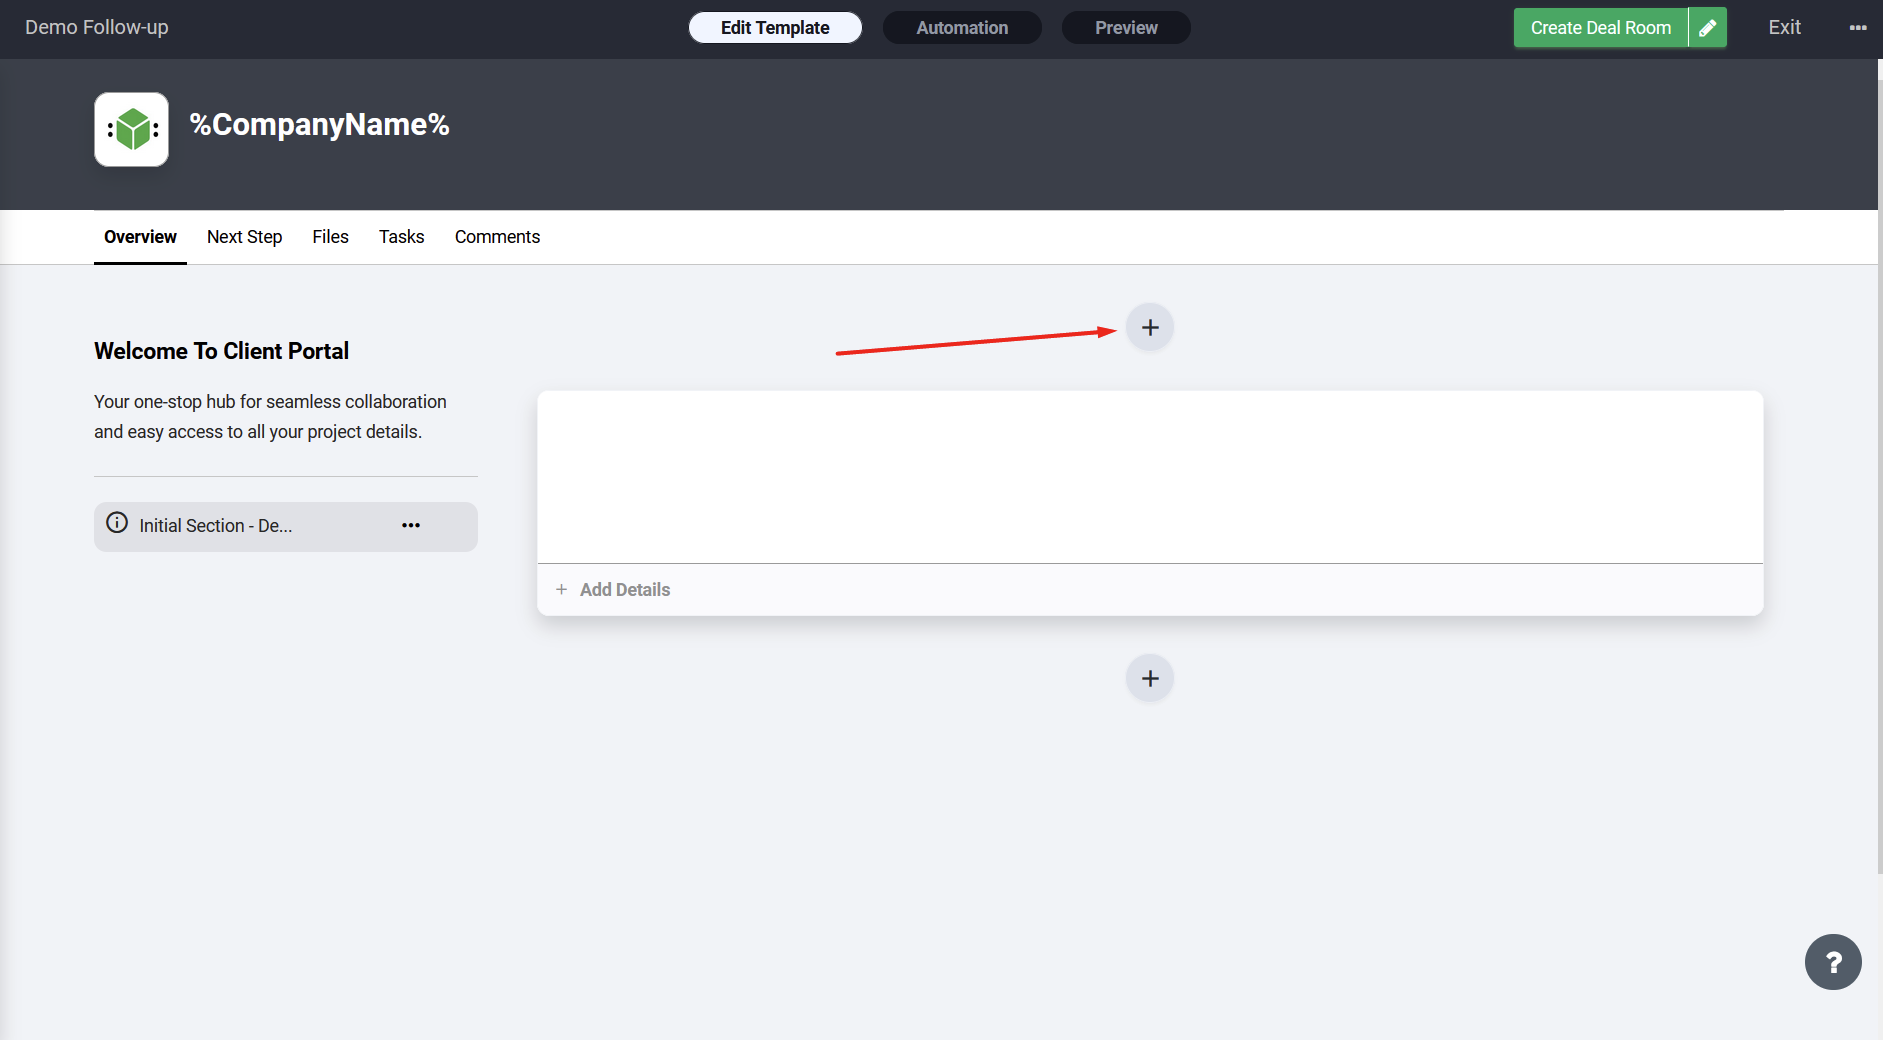
2. After entering the Deal Room Template name you will be redirected to the template edit screen where you can add a section by clicking on the ‘plus’ icon.
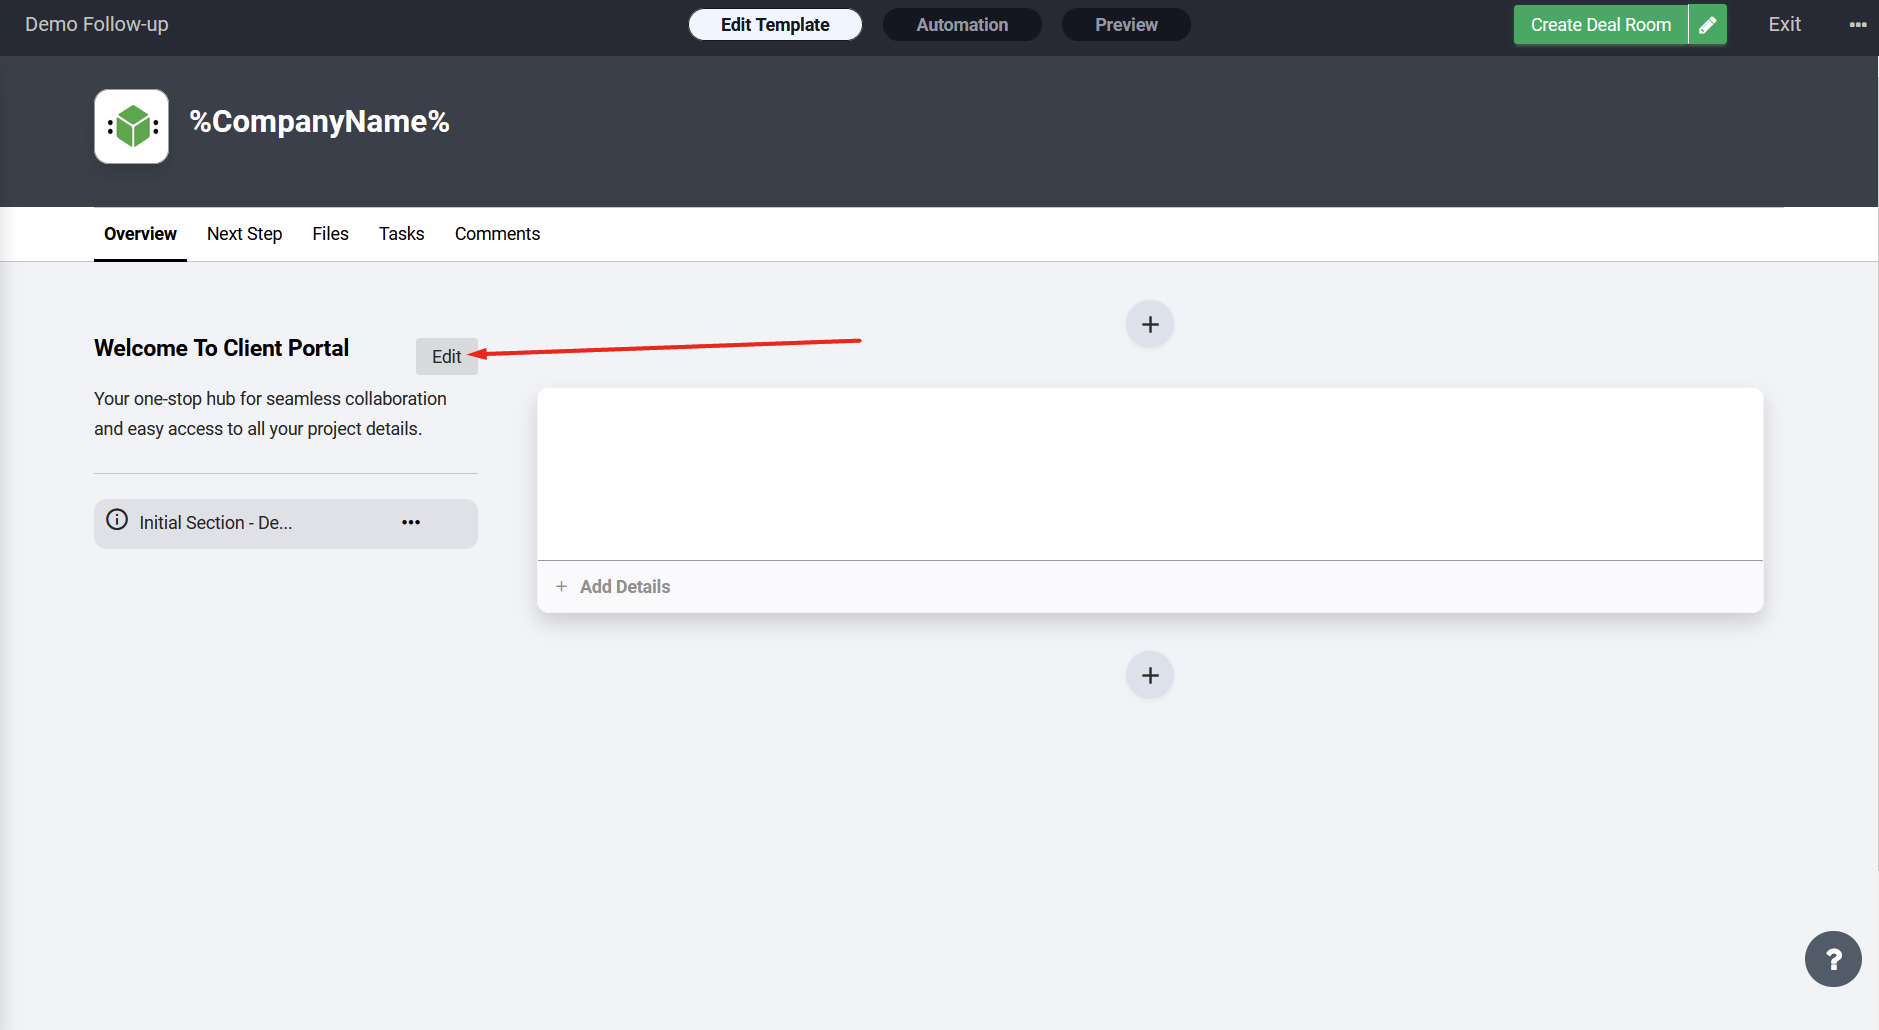
3. On the left side of the menu you can set the template layout
4. Inside the section content you can use variables with brackets. The system will ask you to provide information for all the variables when creating a Deal Room from this template
5. In order to create a Deal Room from a template just click the ‘Create Deal Room’ button and fill out the Request Form
Before initiating a Request make sure that you went through the Docscube Process Setup.
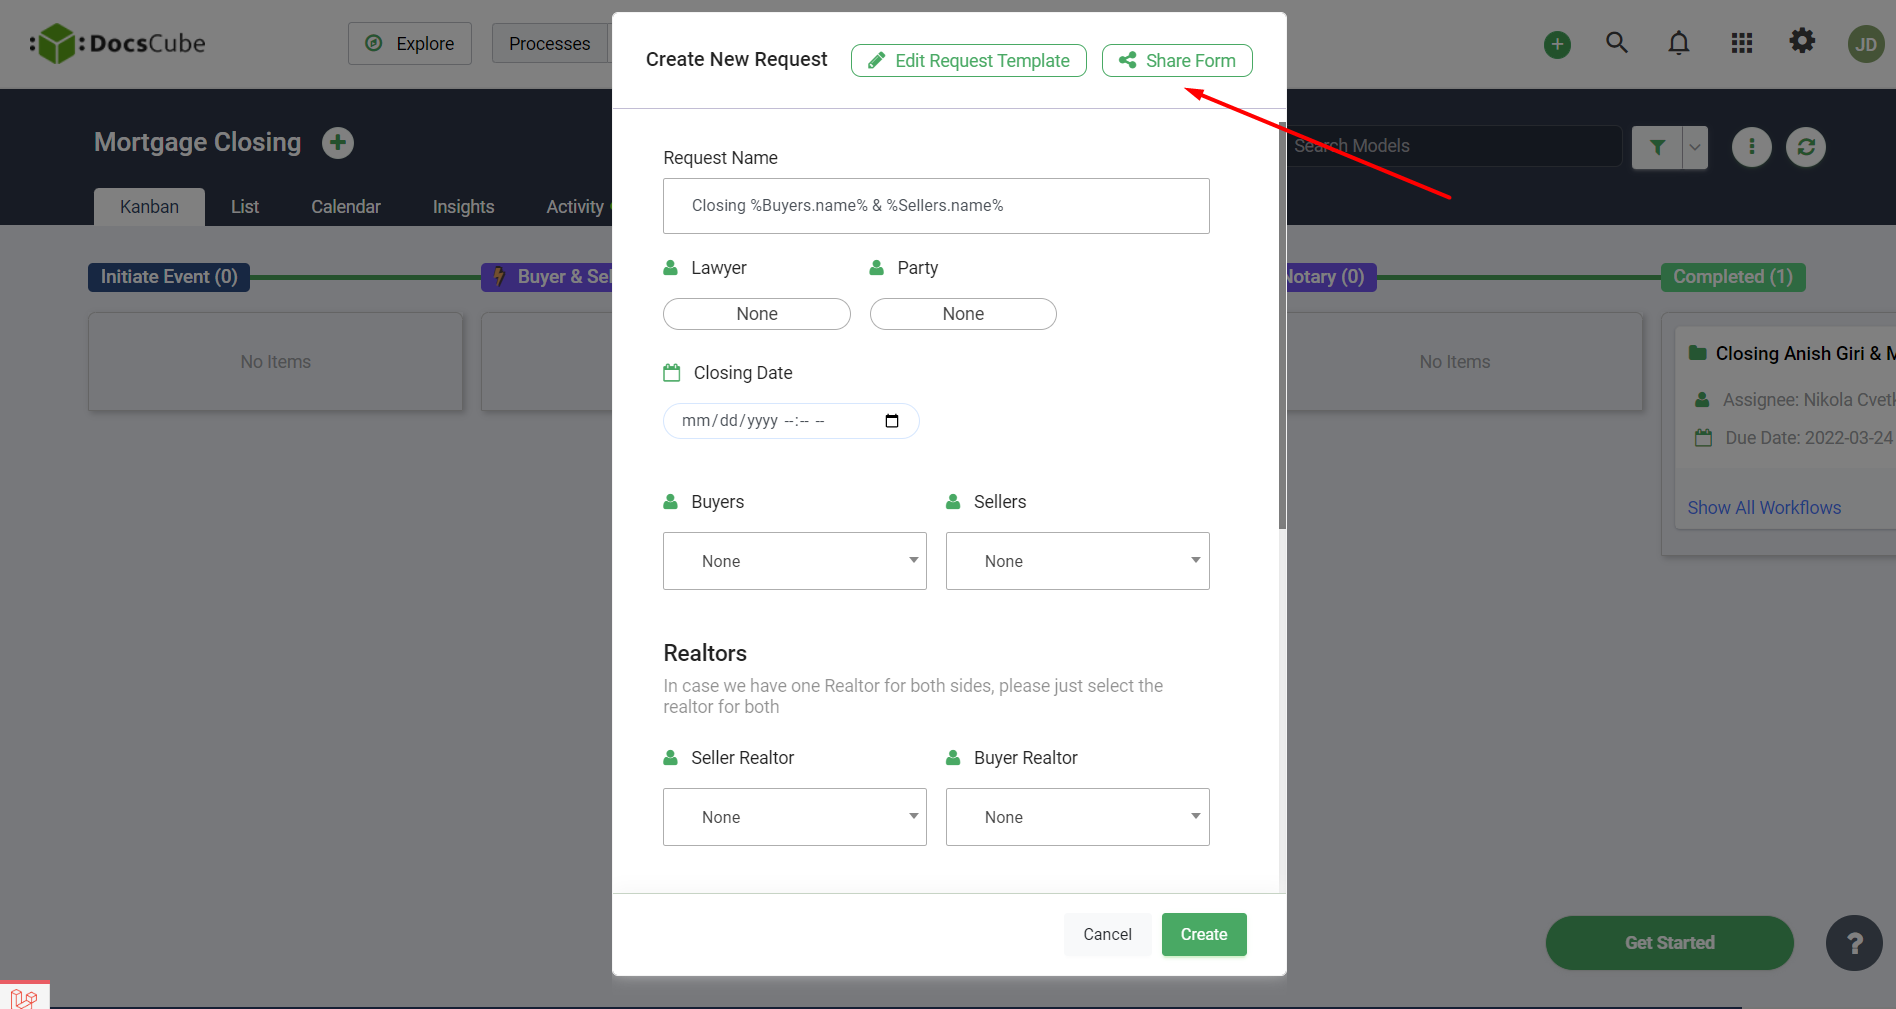
Once you are happy with the Process Setup you are ready to initiate a request. Request is initiated when Request Form is submitted. There are 4 ways to do it. Three initiate the process internally inside the application and the forth one initializes the process externally (doesn’t require for a user to login).
Internal Process Initiation:
1. On completing the Process Wizard setup, once you set up the Automation part a ‘Start Process’ button will appear. Clicking on the button will open a Request Form ready to be submitted. Fill out the form and click the Create button to initiate the process.
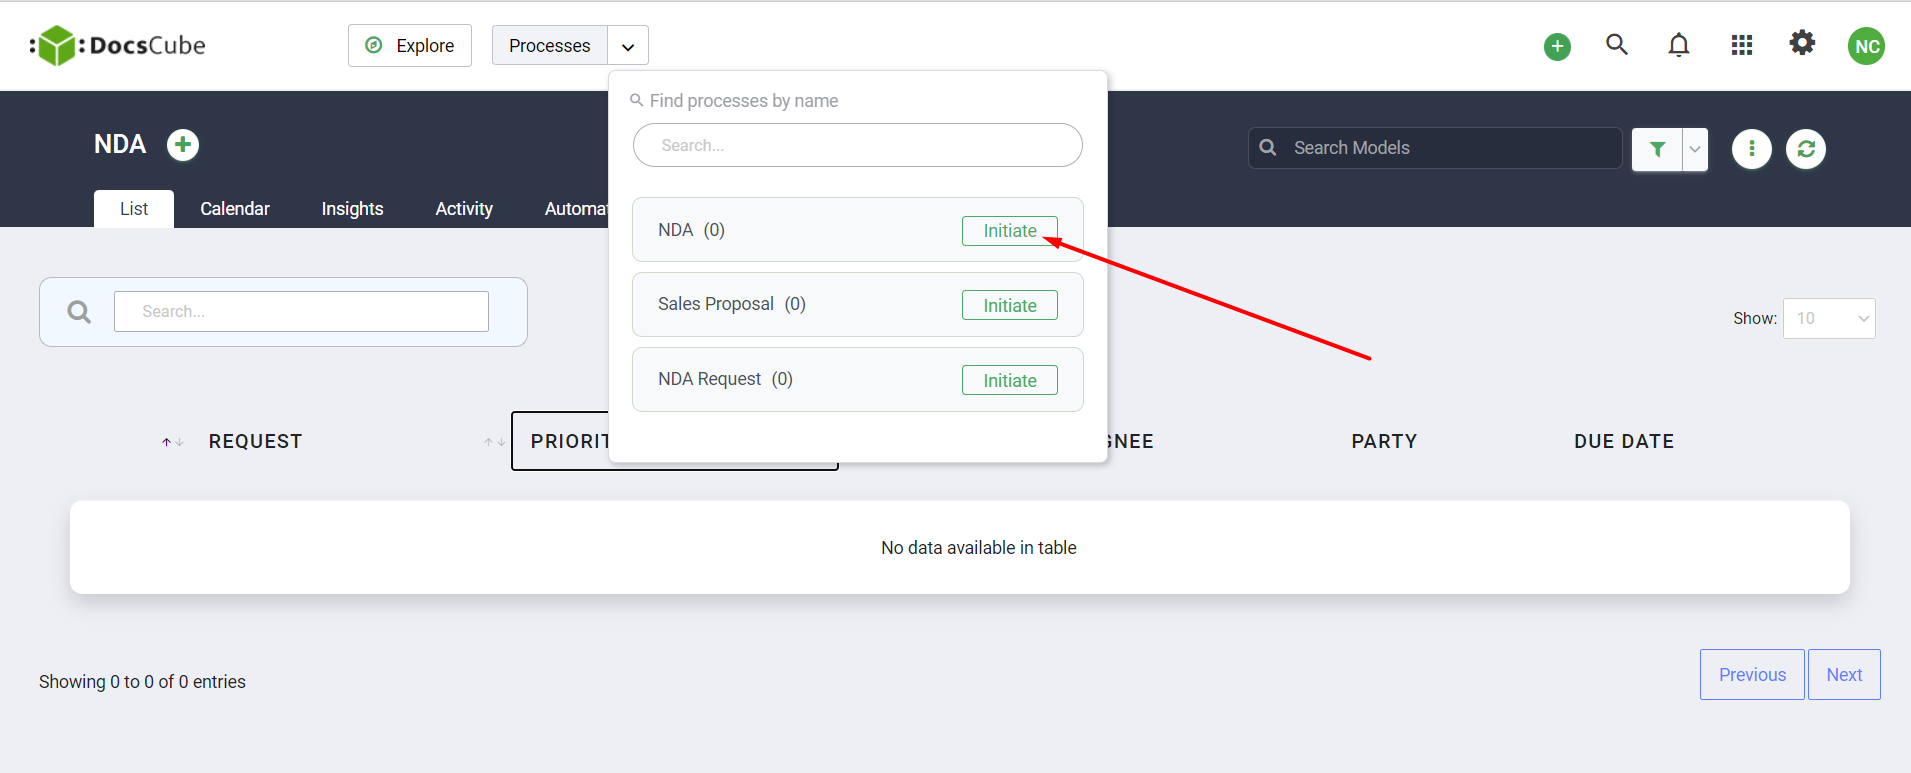
2. Go to the Processes button located in the main menu and click on the arrow to list all created processes on your account. Next to the process name in the dropdown menu you will see the Initiate button. Clicking on the button will open a Request Form ready to be submitted.
3. Go to the Processes page and select the process for which you want to submit request. This will lead you to the Process Overview Page. Here locate the plus icon next to the process name. Clicking the plus icon will pull the request form ready to be submitted.
External Process Initiation:
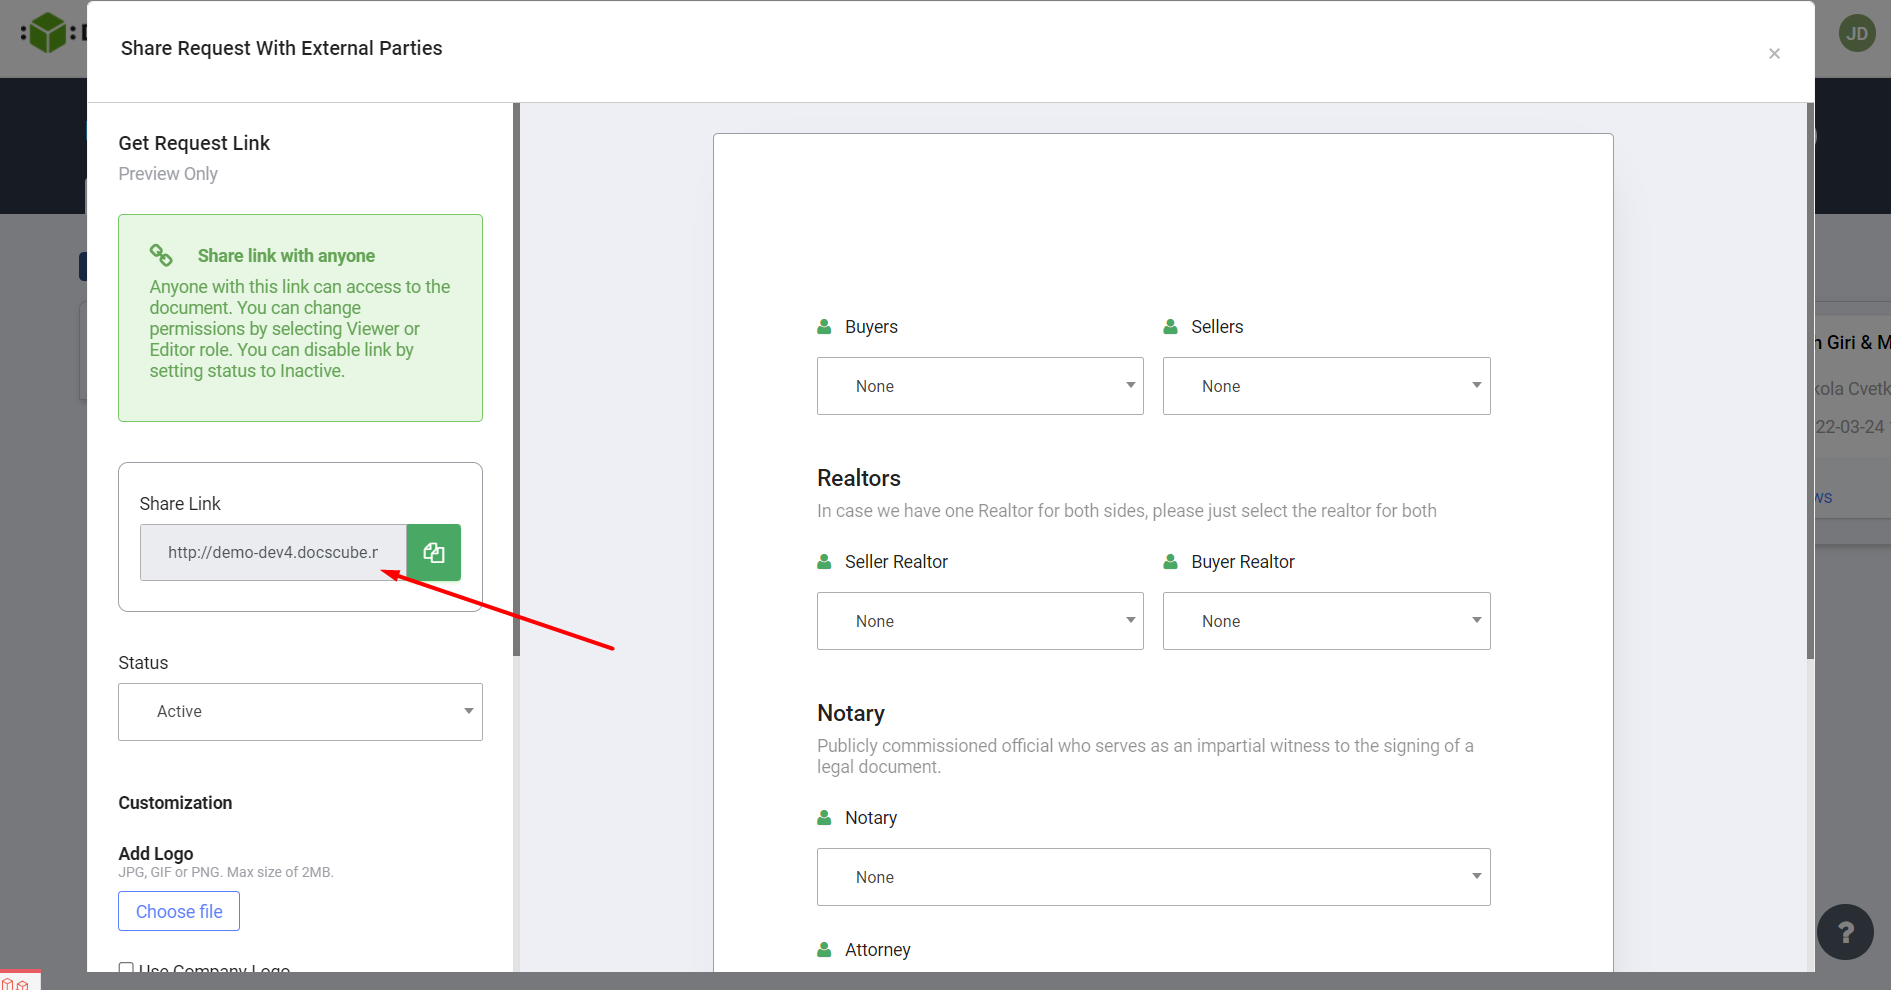
4. Open a Create New Request modal(use any route from previous 3 steps). At the top of the dialog click on the ‘Share Form’ Button. This will open Share Request with External Parties modal. Here you can customize the look of the external form by adding additional heading, description and your company logo. In the share link section on the left, you will find the form url that you can share with your stakeholders, where they will be able to fill out the form and initiate the request.
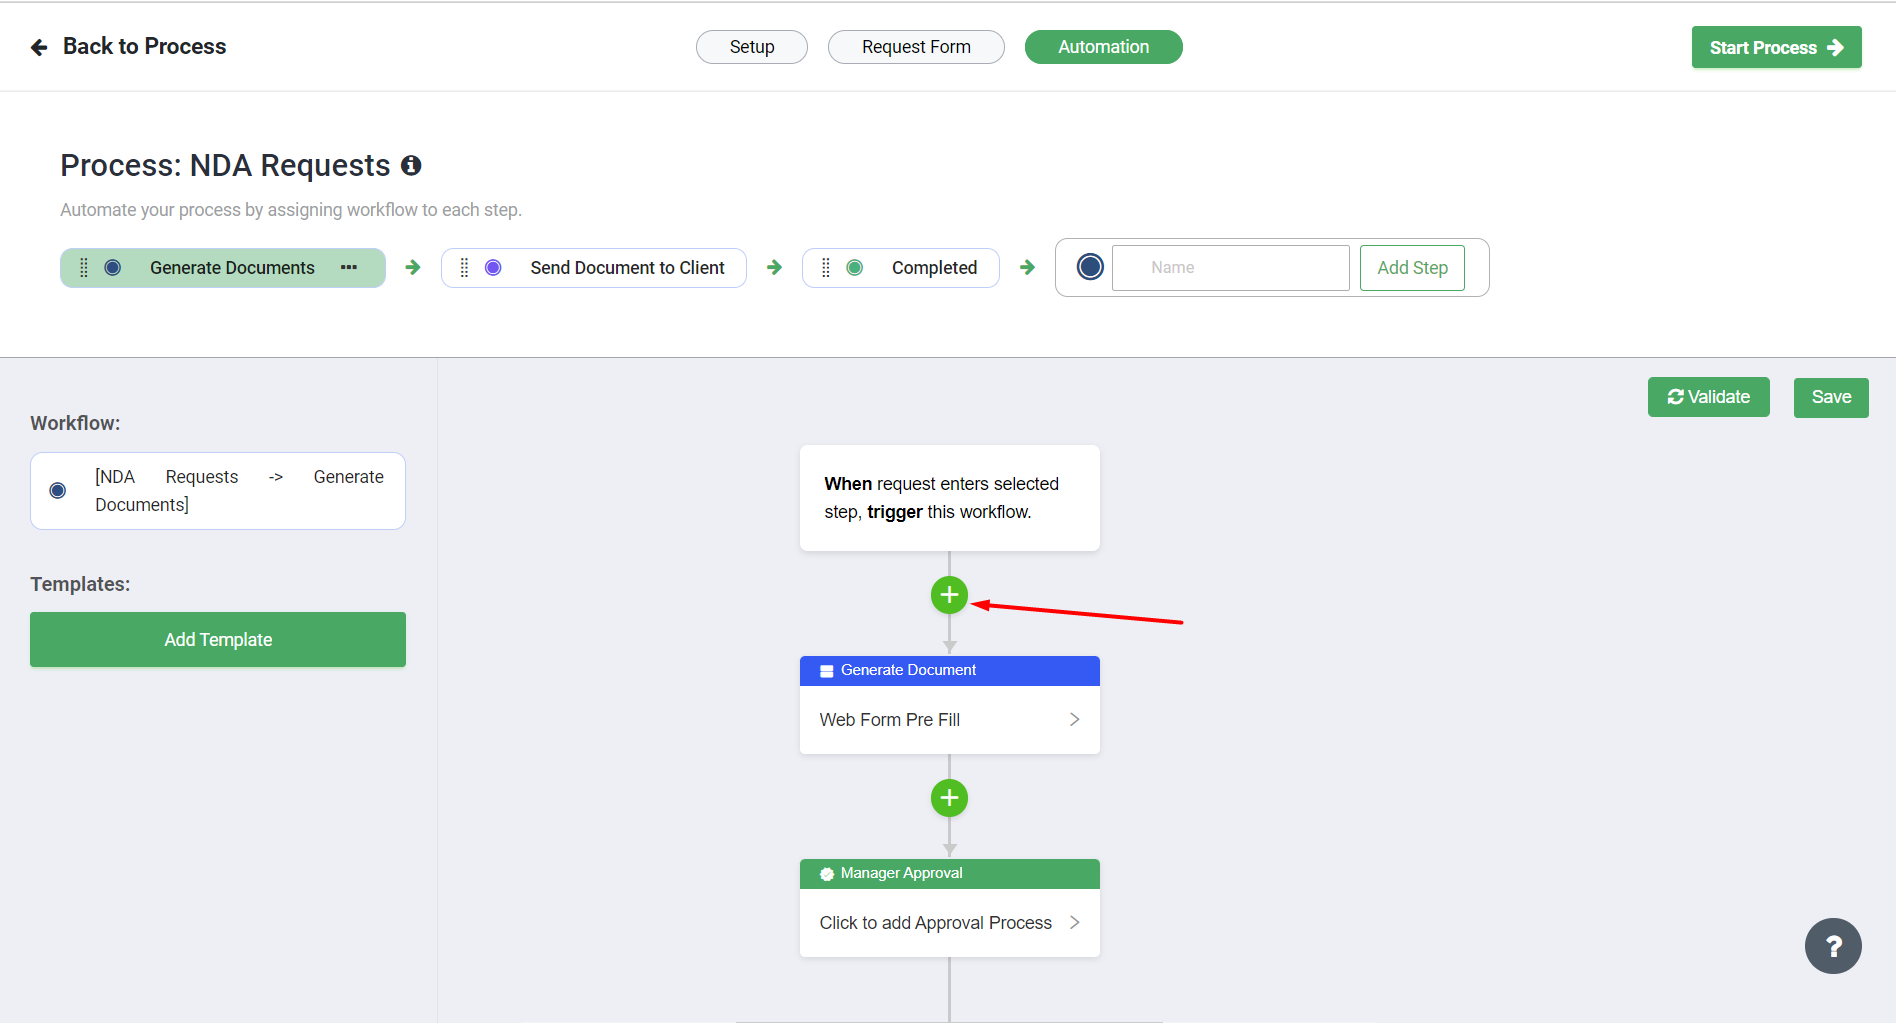
Workflow is a system of managing repetitive tasks that occur in a particular process phase. It represents an order of actions that can be completed by automation when a work-order or a request enters the associated process phase. A process represents a wider picture, while workflow zeros in on the actions necessary for each phase.
Please read ‘How to Set Up DocsCube process’ for more information on how to setup process and phases. Once you have a phase you can create a workflow that will execute when the request enters that phase.
Workflow actions are added by clicking the plus icon.
All the information from the Request Form and also data generated in previous phases will be available inside the workflow action setup as variables.
As part of the workflow you can set up the following actions: generate document, generate webform, prefill document, create party, send webform for input, send email, send for approval, send for signing, create notification, create task and set delay.
Tip: Use ‘Set Status’ action to move the request between phases once the actions prior are completed.
Lorem Ipsum is simply dummy text of the printing and typesetting industry. Lorem Ipsum has been the industry's standard dummy text ever since the 1500s, when an unknown printer took a galley of type and scrambled it to make a type specimen book. It has survived not only five centuries, but also the leap into electronic typesetting, remaining essentially unchanged. It was popularised in the 1960s with the release of Letraset sheets containing Lorem Ipsum passages, and more recently with desktop publishing software like Aldus PageMaker including versions of Lorem Ipsum.
Are you sure you want to remove Billing Plan?
This filed will be available when the following option is selected